Web Development
Learn all things web development from the perspective of an internal developer or contractor at WebMarketers.
- 10 Step Quality Assurance Process
- Website Launch Checklist
- Setting up a DNS Zone in Cloudflare
- Introduction to HTML5 Display Ads
10 Step Quality Assurance Process
All quality assurance docs are to be created in Google Docs in the client's Design & Development folder.
What's included in the Quality Assurance process?
1. Design Consistency
-Compare the website against the design mockups.
-Ensure accurate layout, typography, colors, and spacing alignment.
2. Responsiveness
-Review layouts and verify interactions on various screen sizes (desktop, tablet, mobile).
3. Performance Testing
-Check Core Web Vitals (e.g., Largest Contentful Paint, Cumulative Layout Shift) and comment on improvements which need to be applied.
4. Error Validation, Form Fields, Form Notifications
-Check all form fields for validation rules.
-Verify that the correct fields are set to required.
-Confirm that the correct form input type is used.
5. Accessibility Compliance
-Ensure the site meets accessibility standards (WCAG) by using Accessibility Insights Fast Pass.
6. Browser Compatibility
-Verify functionality across major browsers (Chrome, Firefox, Safari).
7. Interaction Testing
-Click all links, buttons, and interactive elements to confirm they have hover states and go to the right page.
8. Functionality/Integrations Review
-Review project scope to confirm no features are missing, that all requirements are met, including but not limited to integrations, accessibility plugins, cookie policy, etc...
9. Security Checks
-Confirm SSL/TLS certificate validity.
-Install and configure WordFence for security features/vulnerability notifications.
10. AI Optimization Checks
-Confirm the website has an llms.txt file uploaded in the /public_html/ folder, with content that summarizes the company services, description and relevant info
-Confirm that local business schema exists and is embedded in the <head> tag for all pages
Website Launch Checklist
This website launch checklist serves as a comprehensive guide to ensure a smooth and successful deployment of new websites at WebMarketers. It covers essential steps like domain configuration, third-party licenses, security measures, backups and indexing.
By following this checklist, you can streamline processes, minimize errors, and achieve a seamless launch experience.
Before you start, make sure you have:
- A well built website that passes our 9 Step Quality Assurance Process.
- Access to the domain the site will use once it's live.
- Some time set aside to focus on the task.
In an ideal world, the domain you will use is already set up on Cloudflare. If it's not set up on Cloudflare, make sure to follow this step by step guide to Setting up a DNS Zone in Cloudflare.
Replace URLs in Elementor -> Tools -> Replace URL
Install Better Search & Replace, Use it to Replace Old Emails/Domains
Set Site to Index in Settings -> Reading
Update Elementor / Domain Linked Licenses
Set Amazon S3 Backups
Verify reCAPTCHA V3 & Google Maps API Keys
Update All Plugins
Create Credentials for Marketing
Notify Marketing Team for Analytics Install
Notify Dev for Spam Protection / SMTP Setup
Check Different Indexed Links on Google
Send Client Test Form Submissions
Notify Client of Launch
Setting up a DNS Zone in Cloudflare
This document provides a step-by-step guide to setting up a domain in Cloudflare, emphasizing its user-friendly interface and straightforward setup process. Cloudflare enhances website performance through faster load times while also offering a secure and reliable platform.
It also makes it very easy for us to find a domain, Cloudflare is our go-to solution for storing clients domain information. It allows us to easily bypass 2FA on registrars during emergencies - when we need access more than ever.
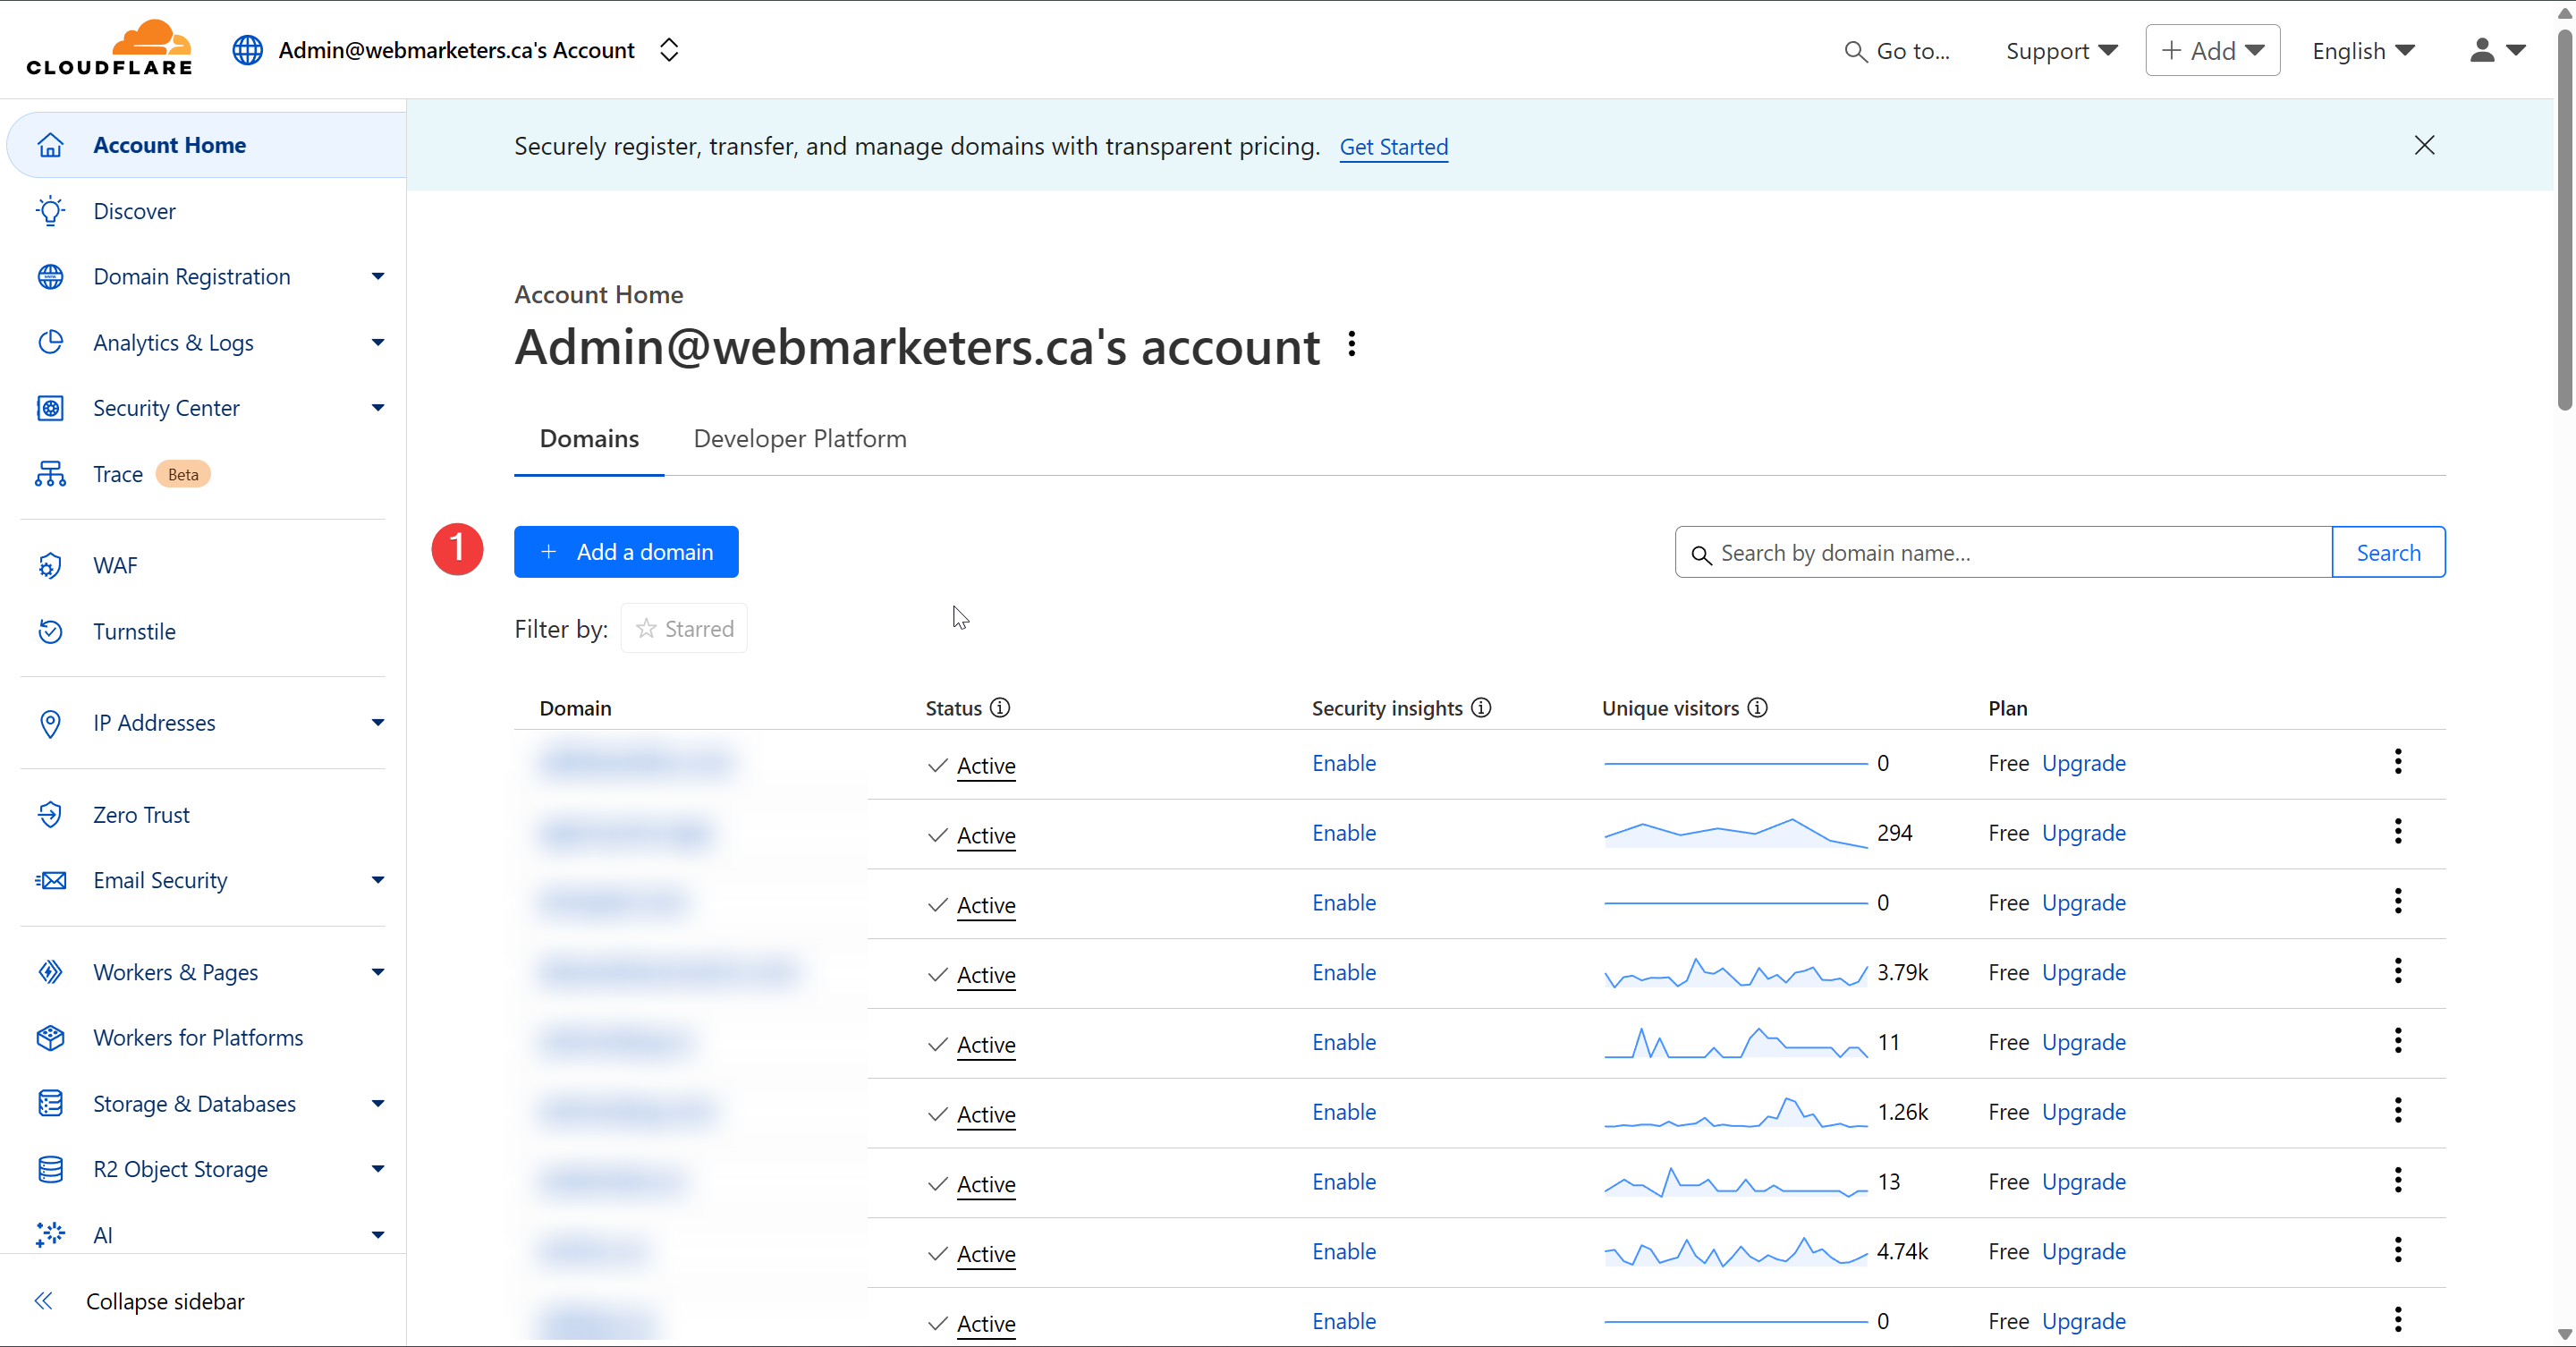
First, head over to our Cloudflare Dashboard and click "Add a domain".
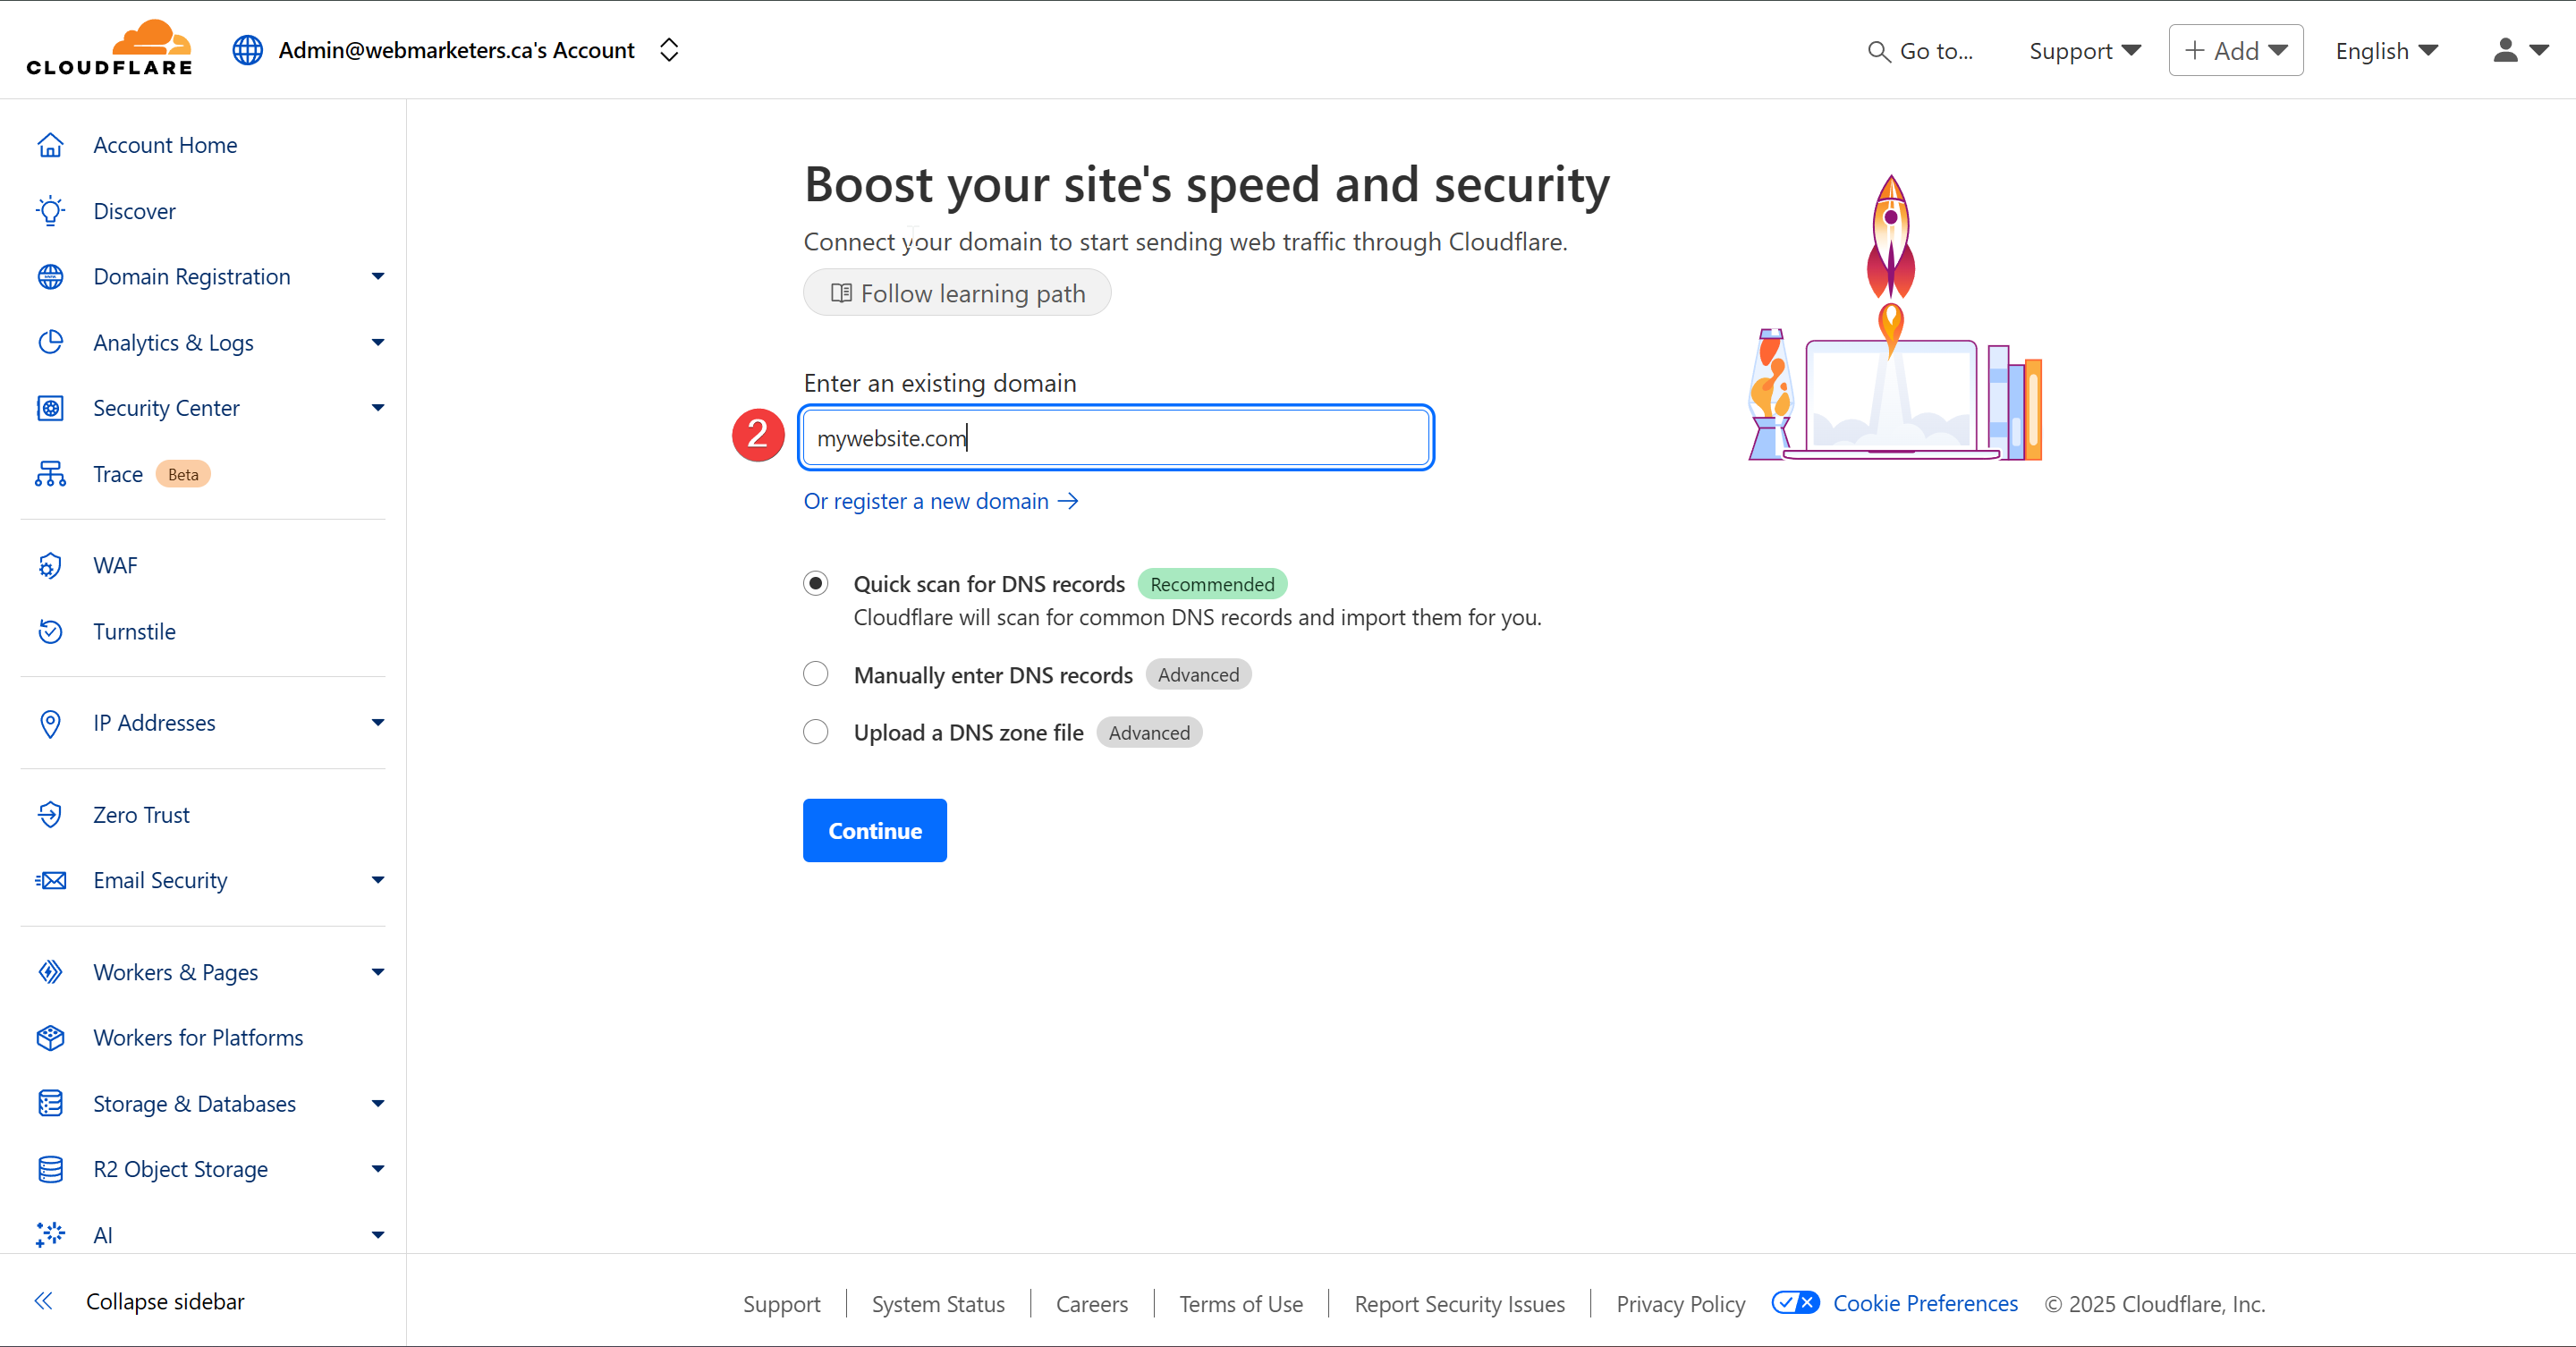
Then, paste or add the domain name and confirm that "Quick scan for DNS records" is selected.
Once that's confirmed, click "Continue".
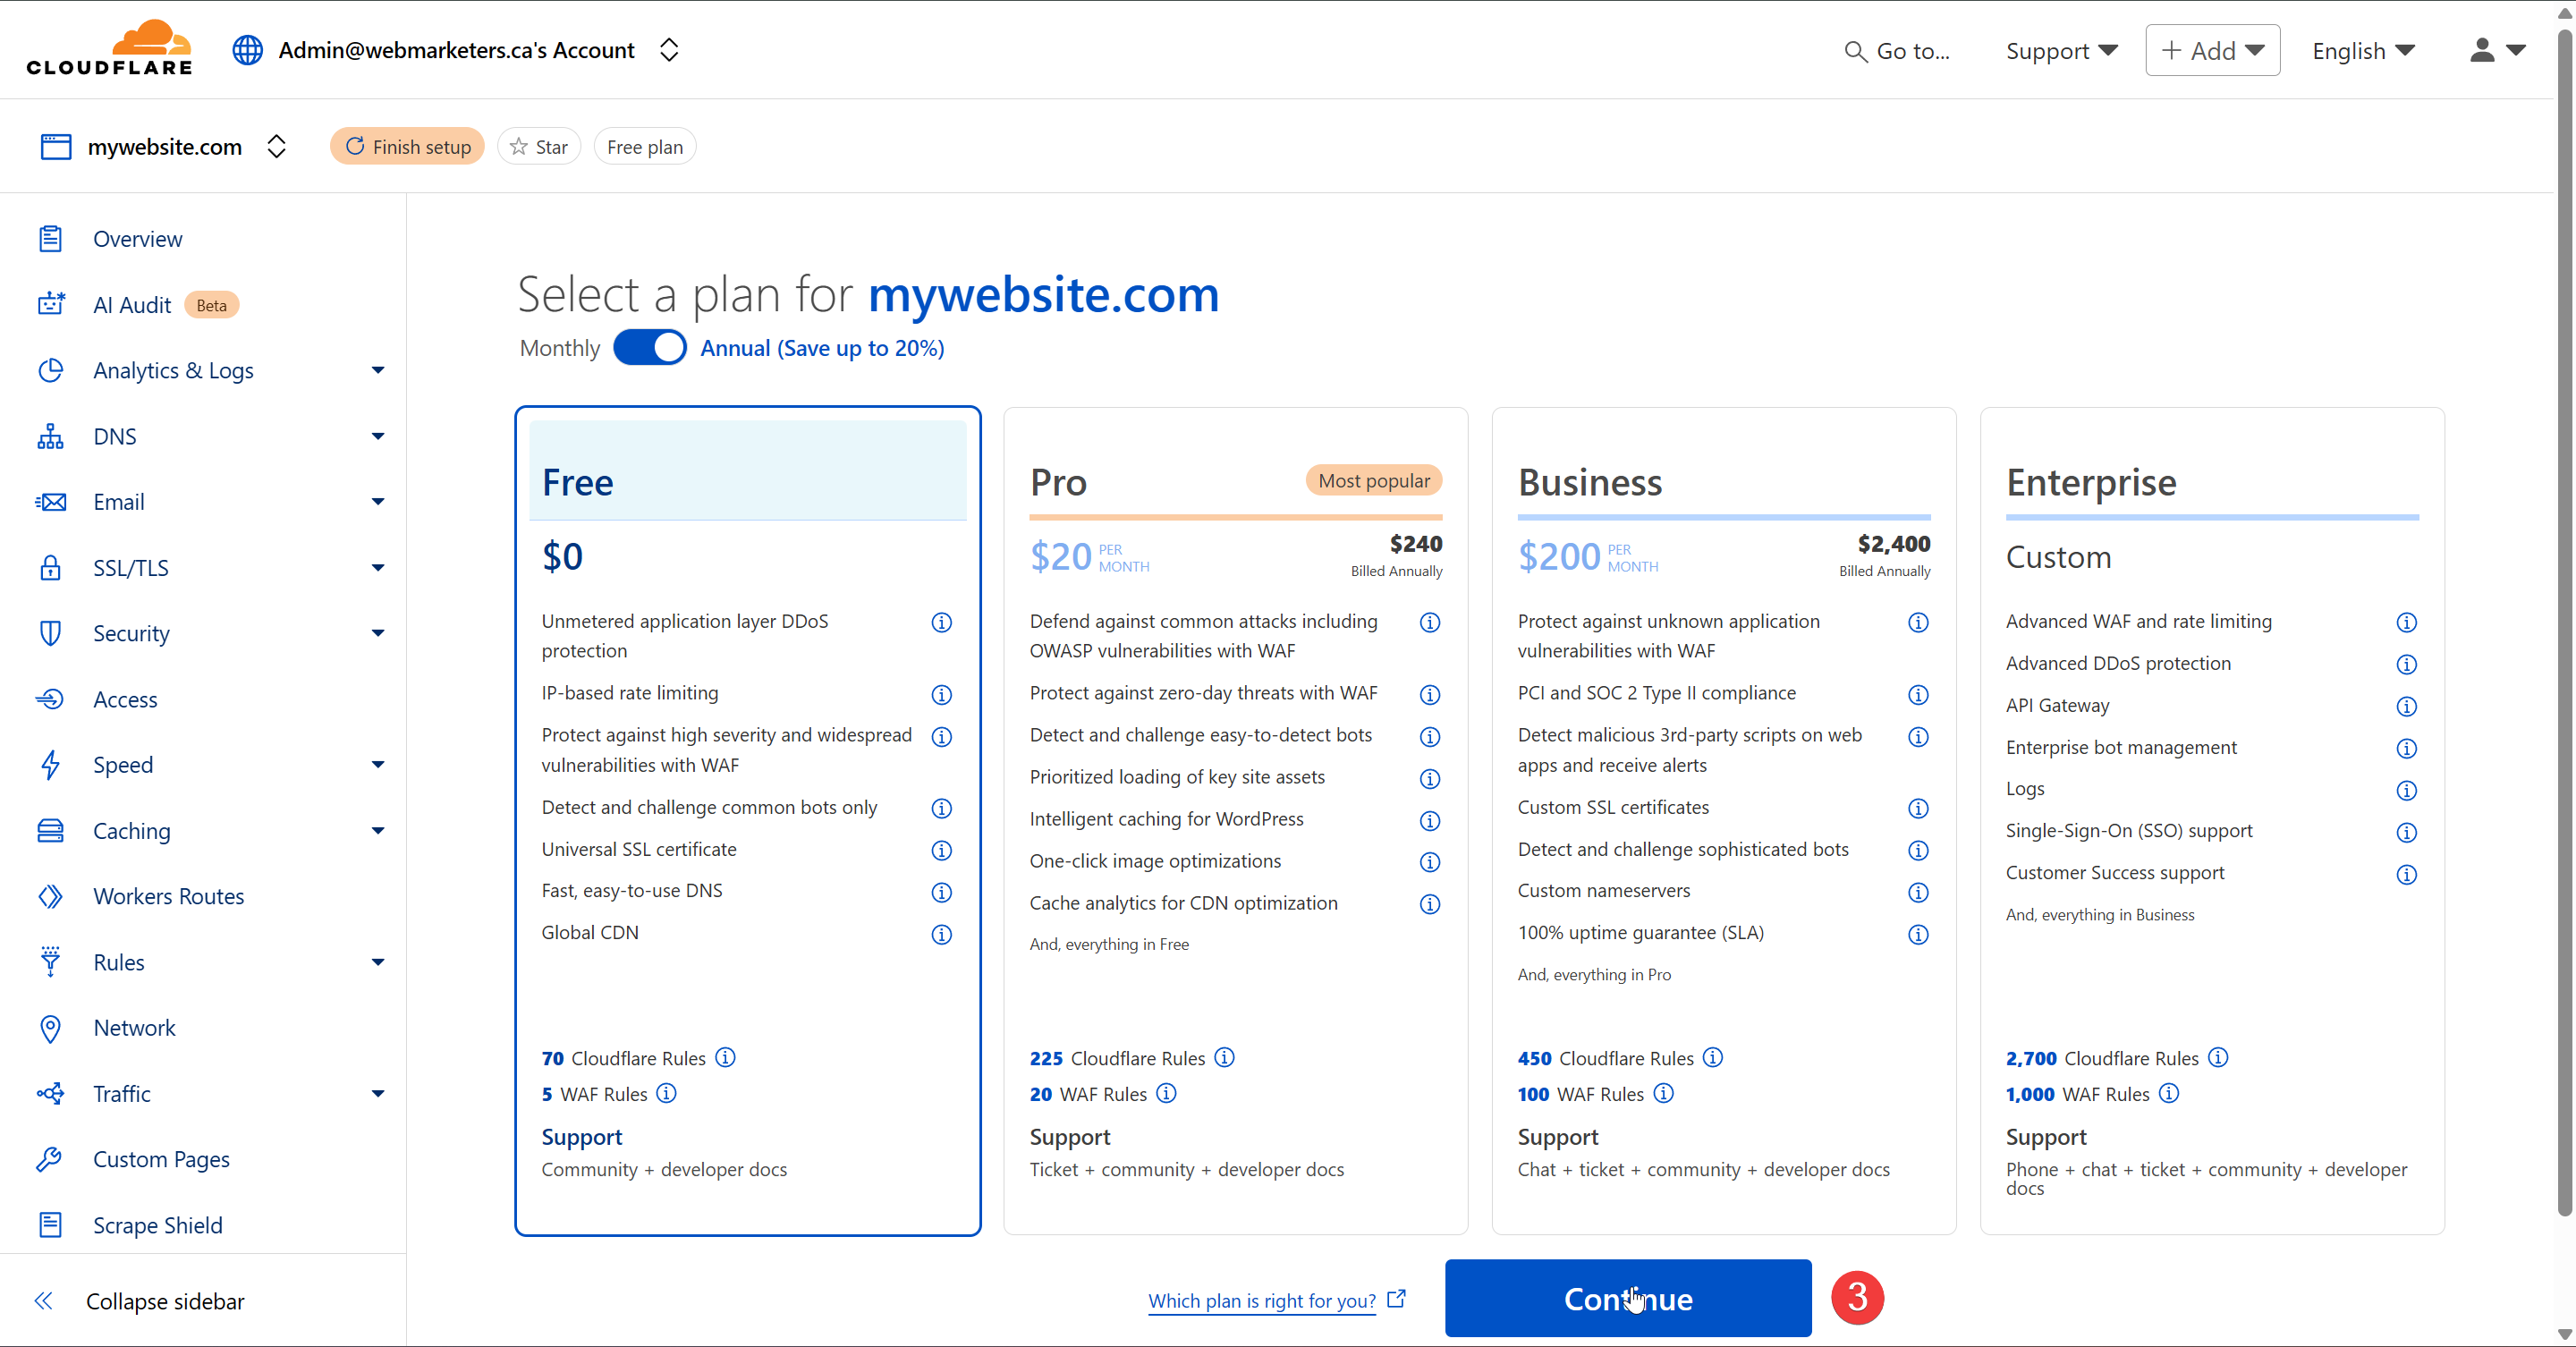
Confirm that the Free plan is selected and click "Continue".
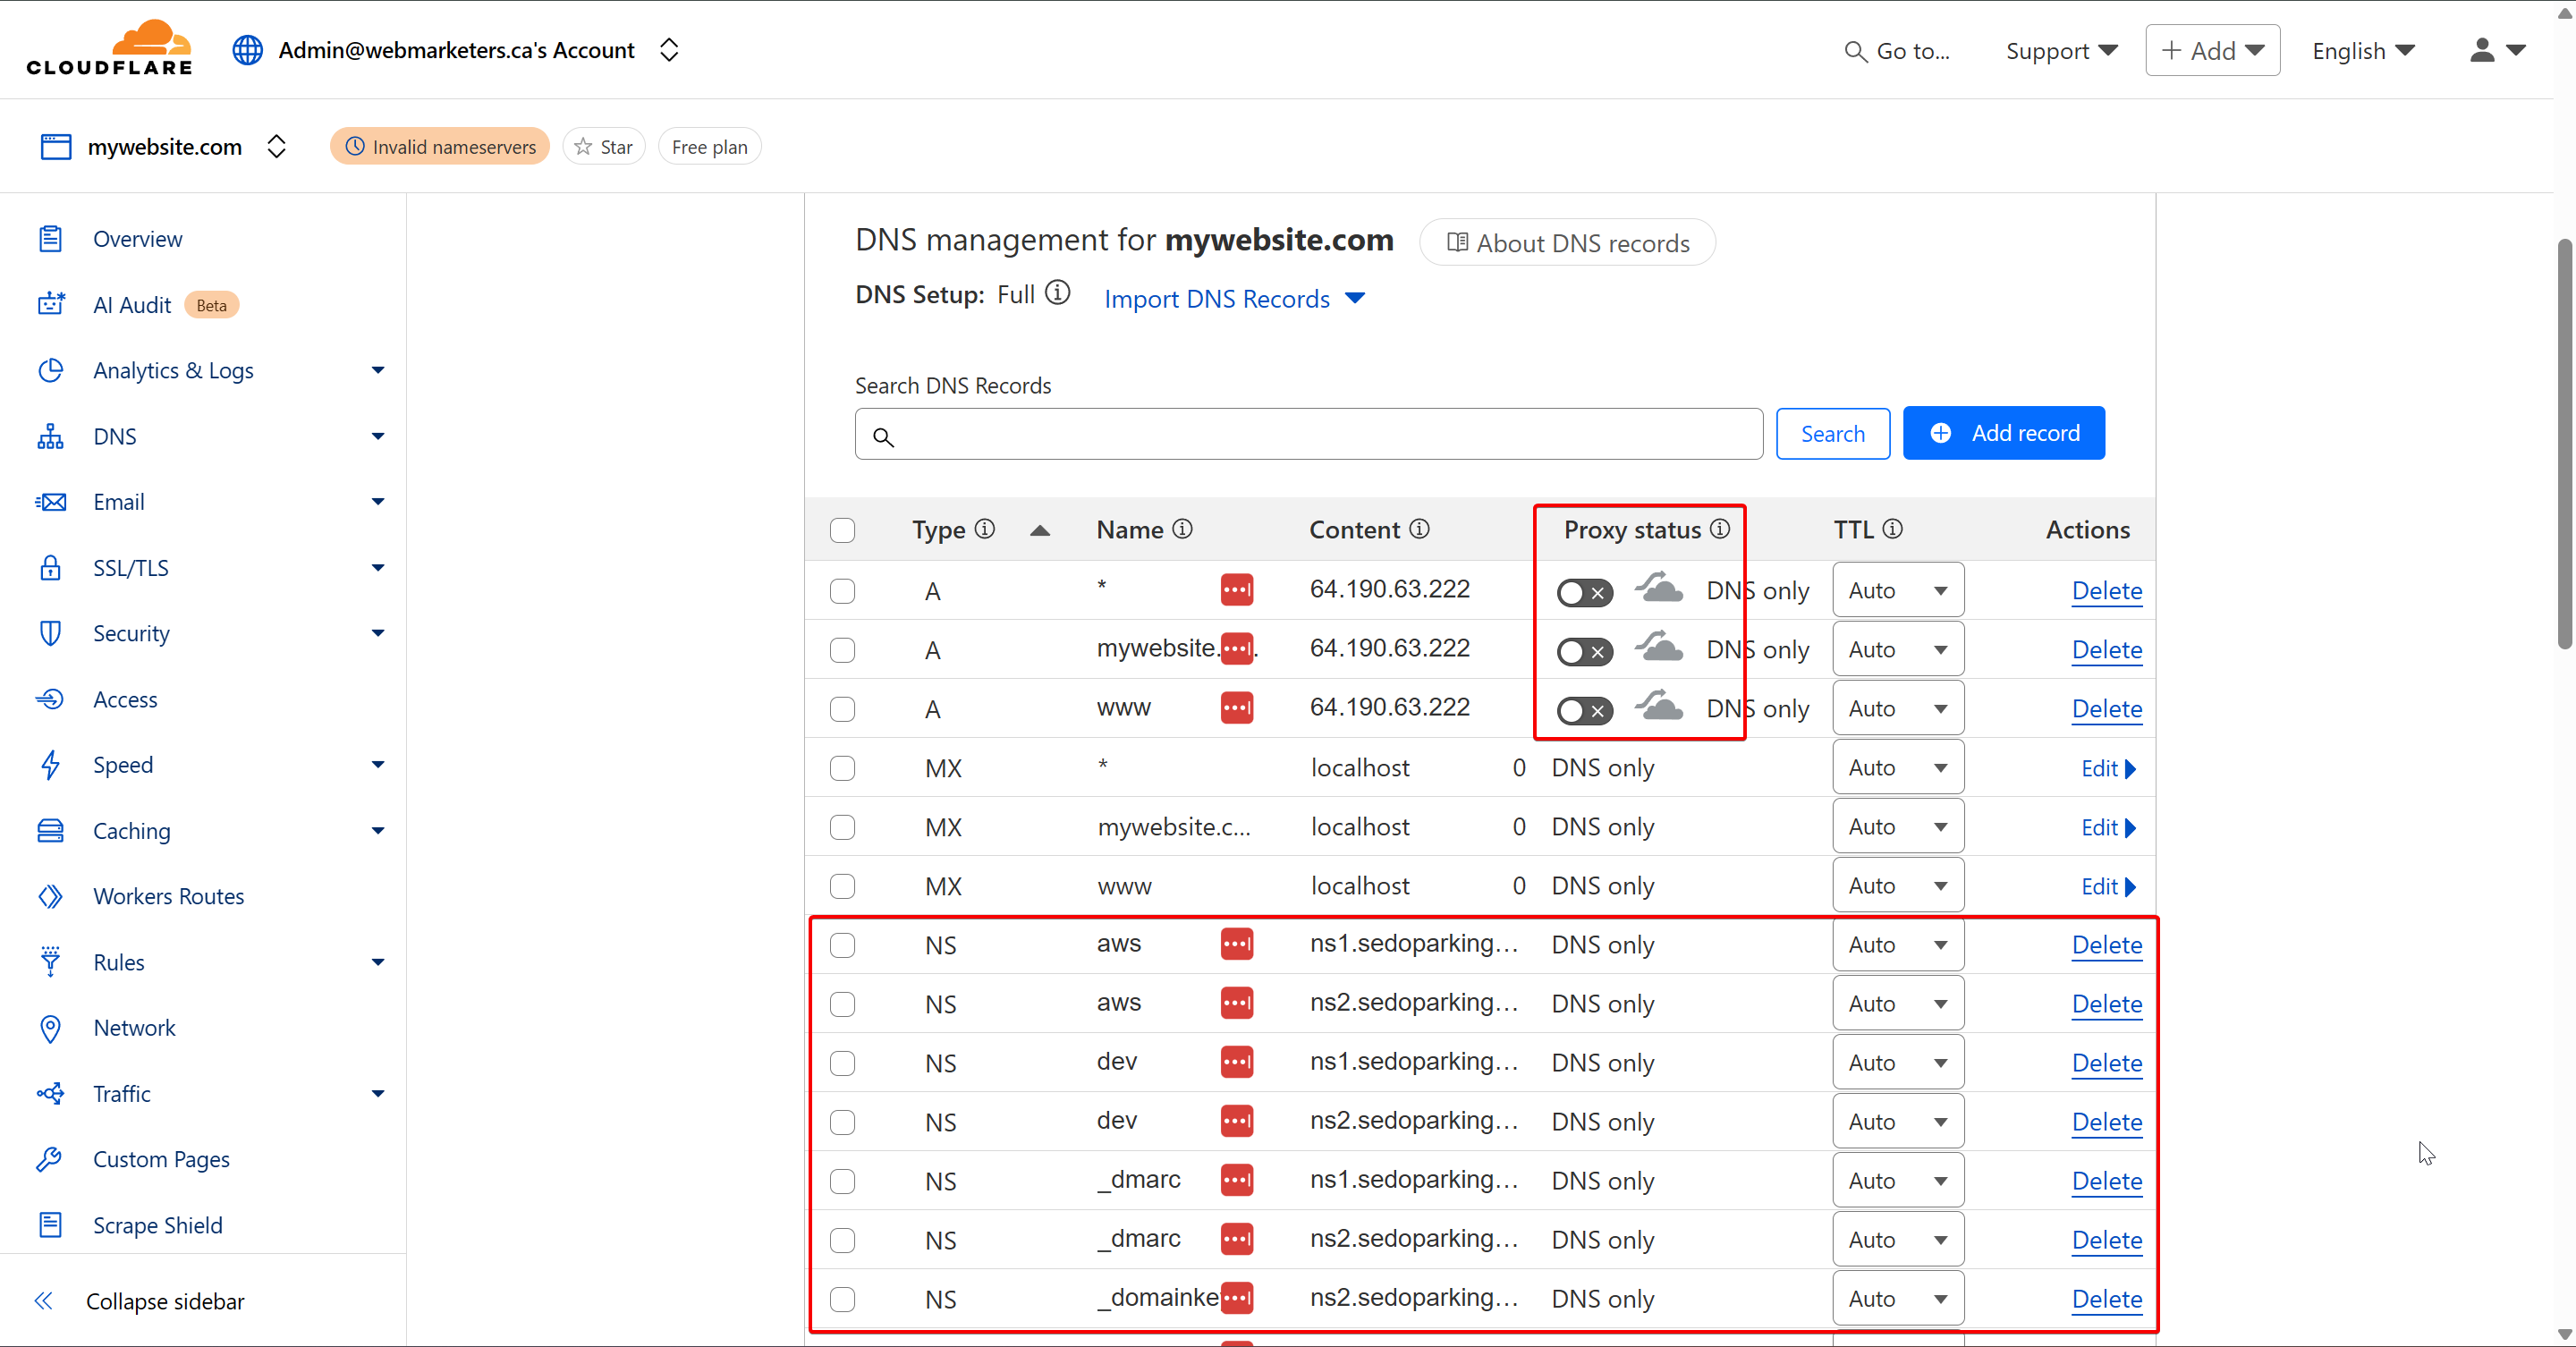
Verify that the DNS records match what you currently have set on the registrar. It's especially important that you confirm that the A, CNAME, MX and TXT Records match existing records.
Cloudflare can be used purely for their DNS Zone. Although they offer a variety of other services, we mainly use it for the DNS Zone, since it allows us to easily see or modify any DNS Records, as well as share access to it with clients.
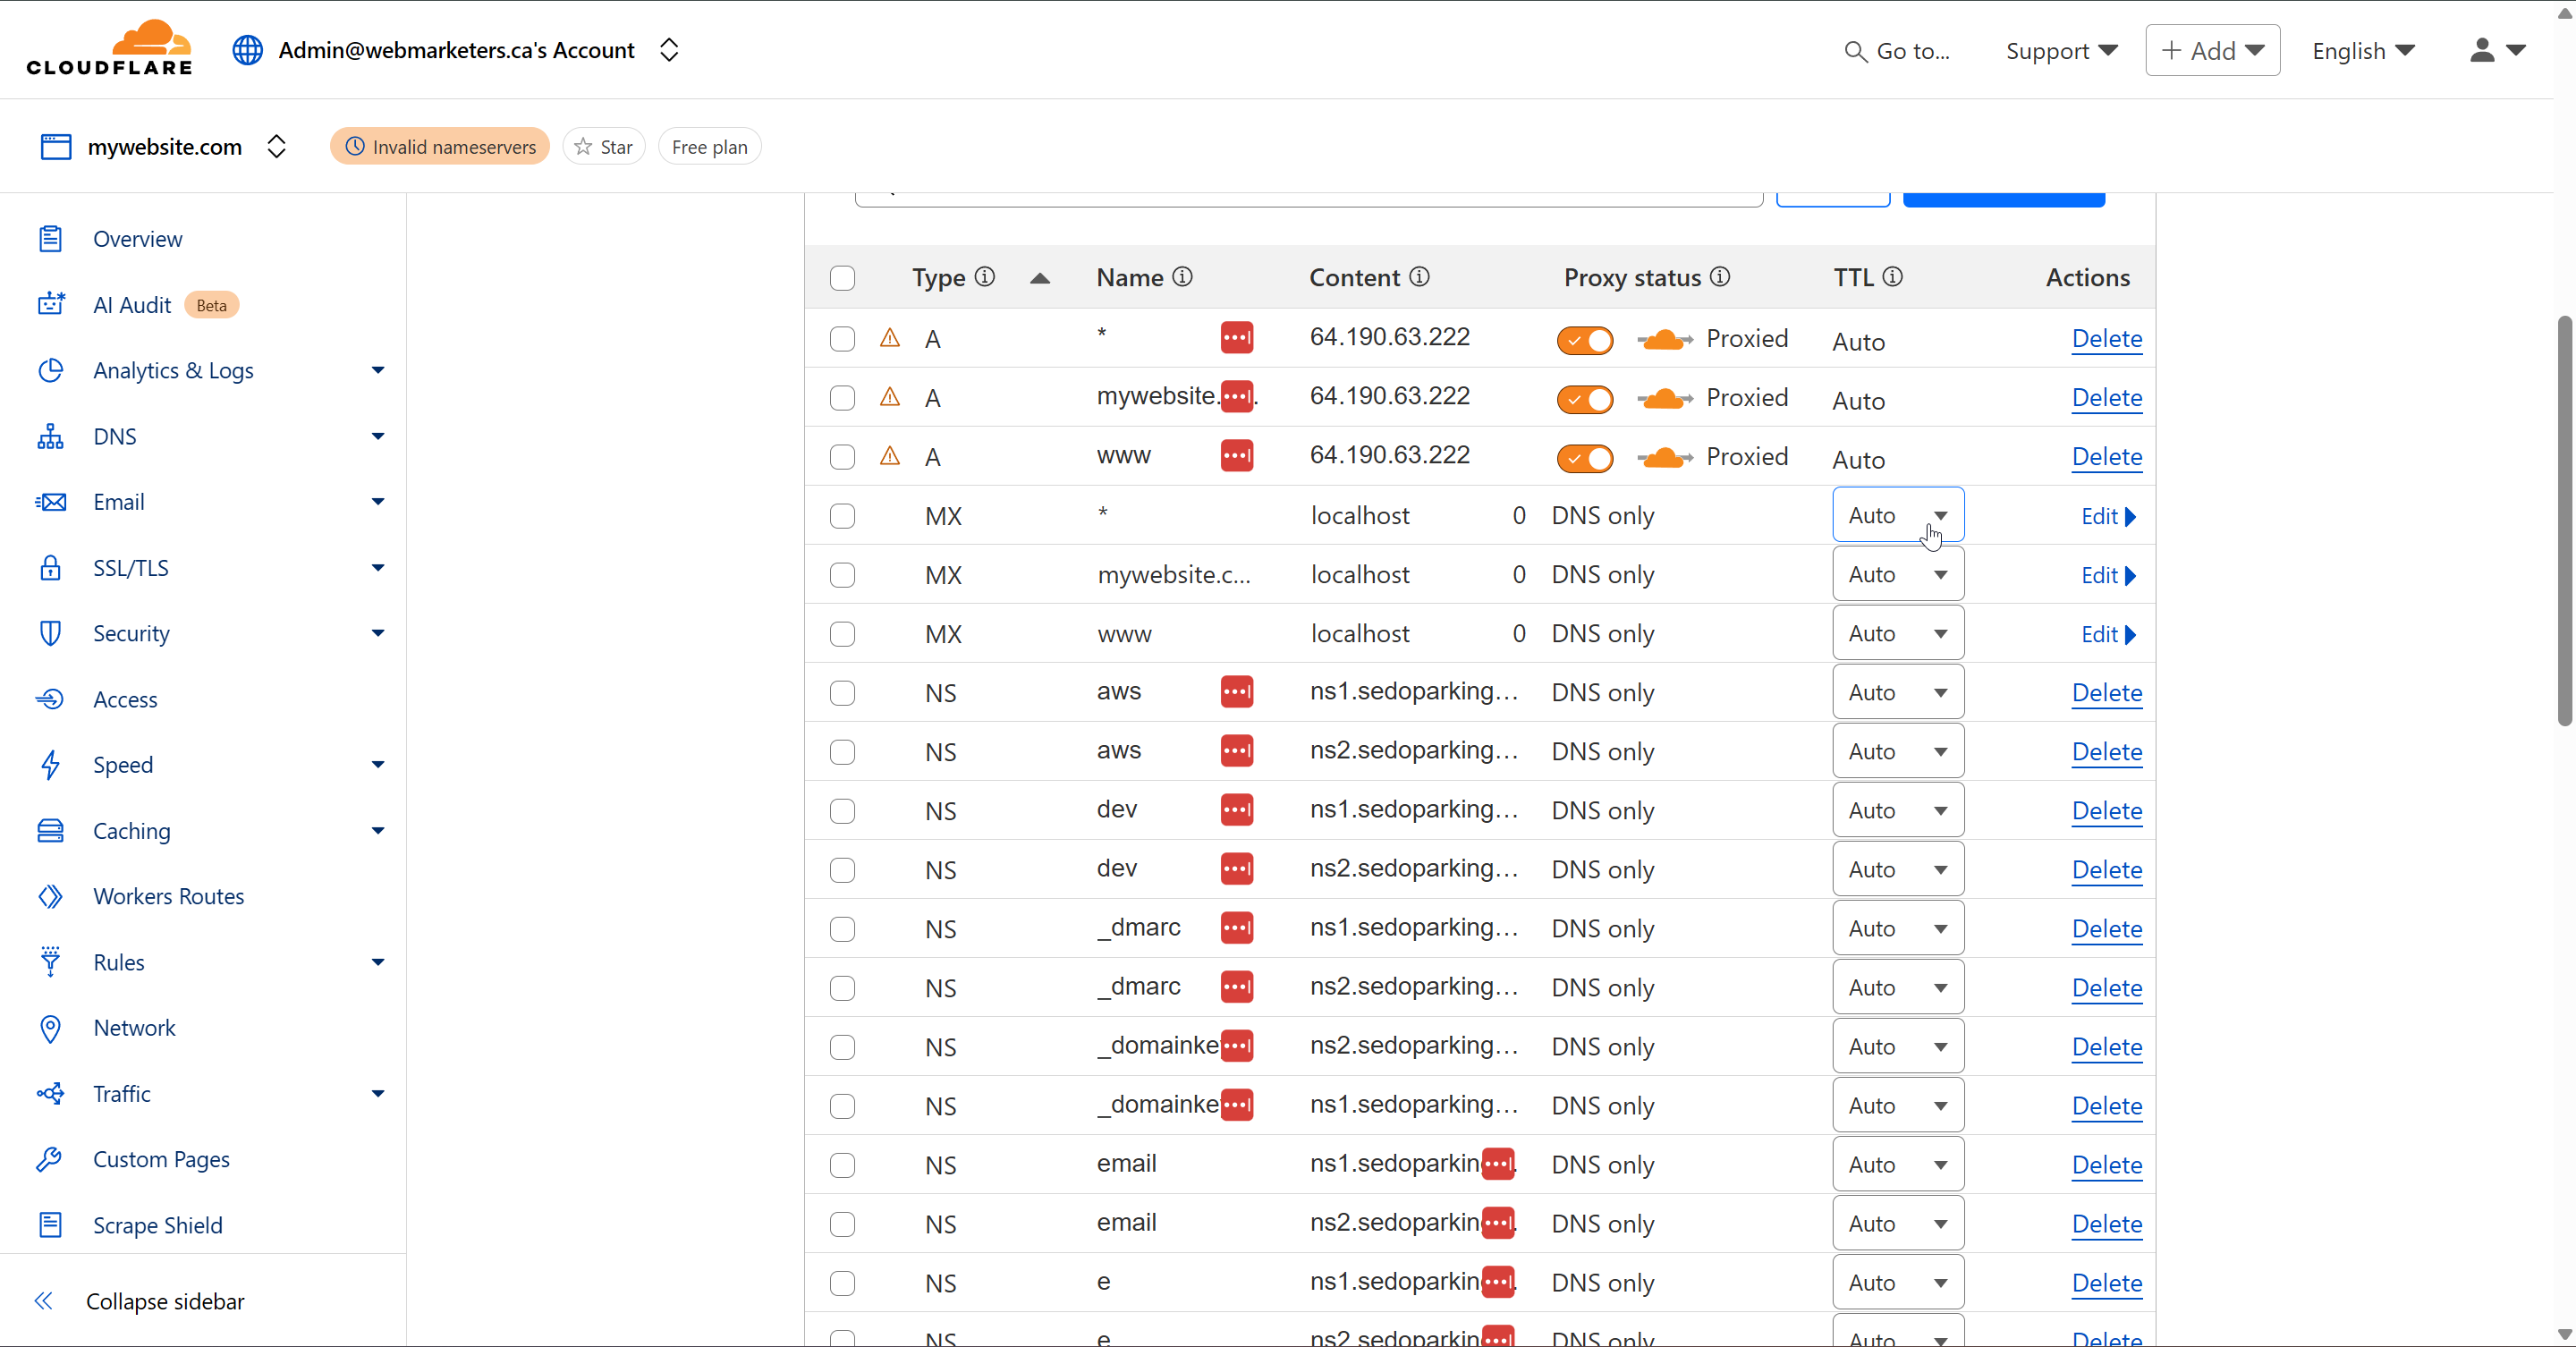
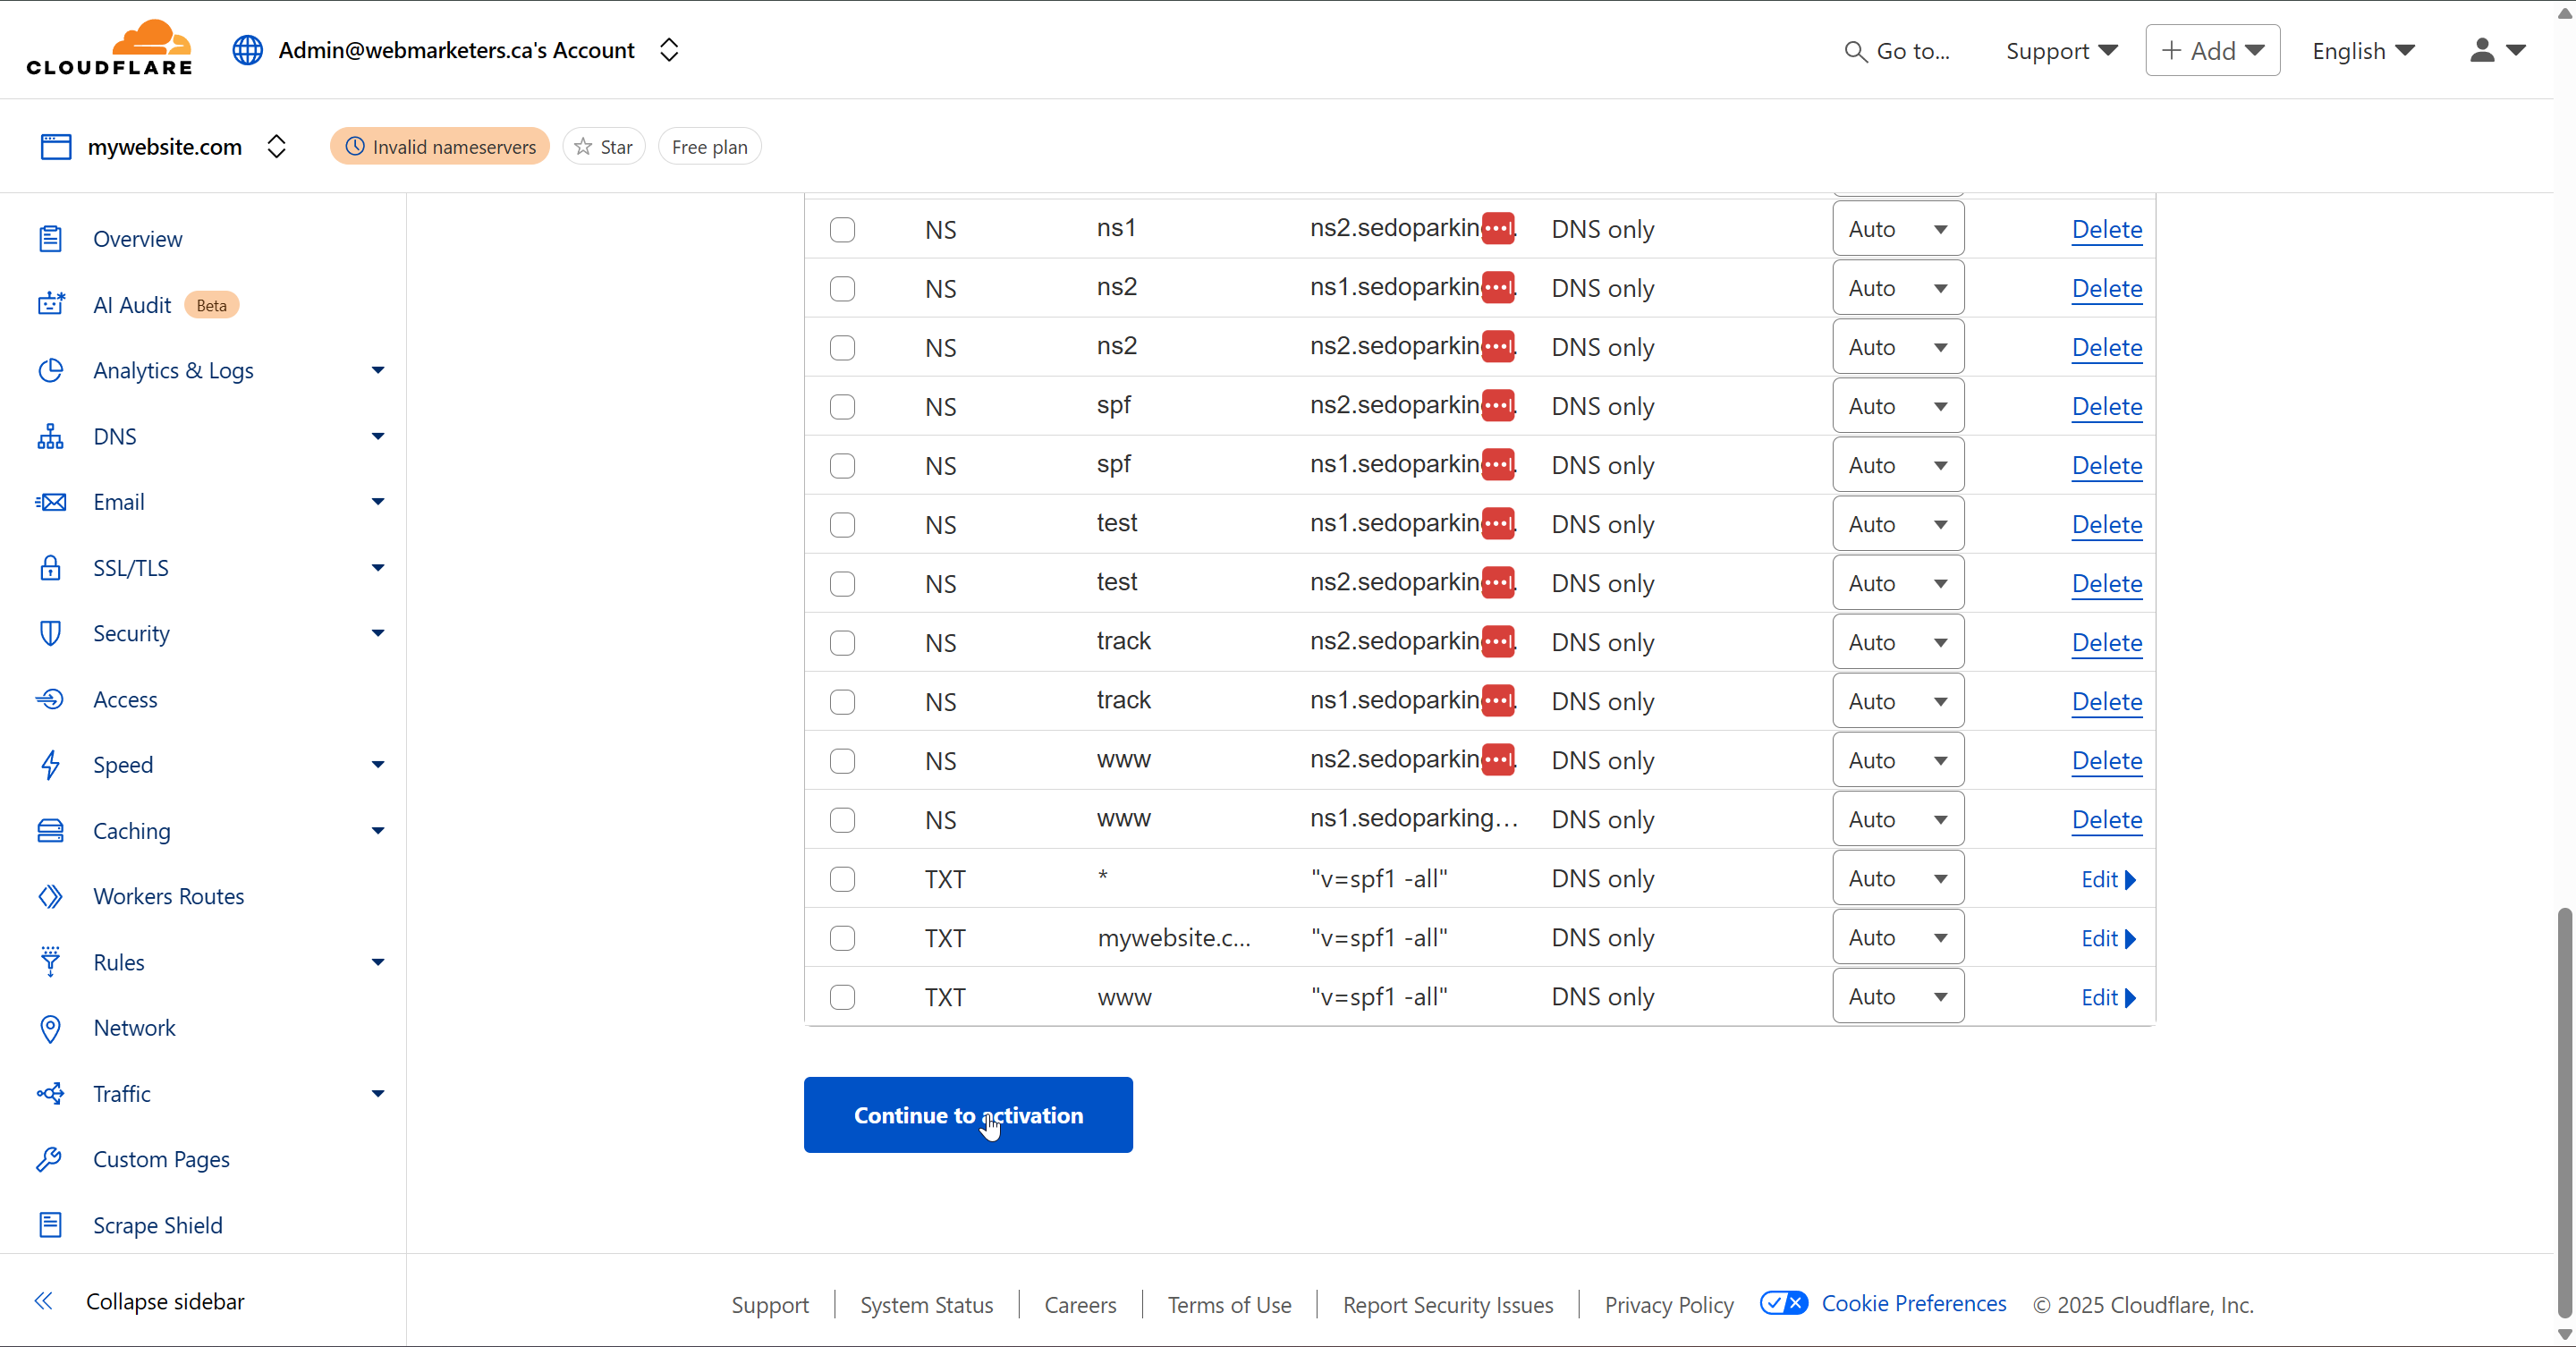
Then, turn off the proxy status for the A Records, and remove all unused NS (Nameserver) Records. These will not be needed with the switch to Cloudflare.
Once this is done, click "Continue to activation".
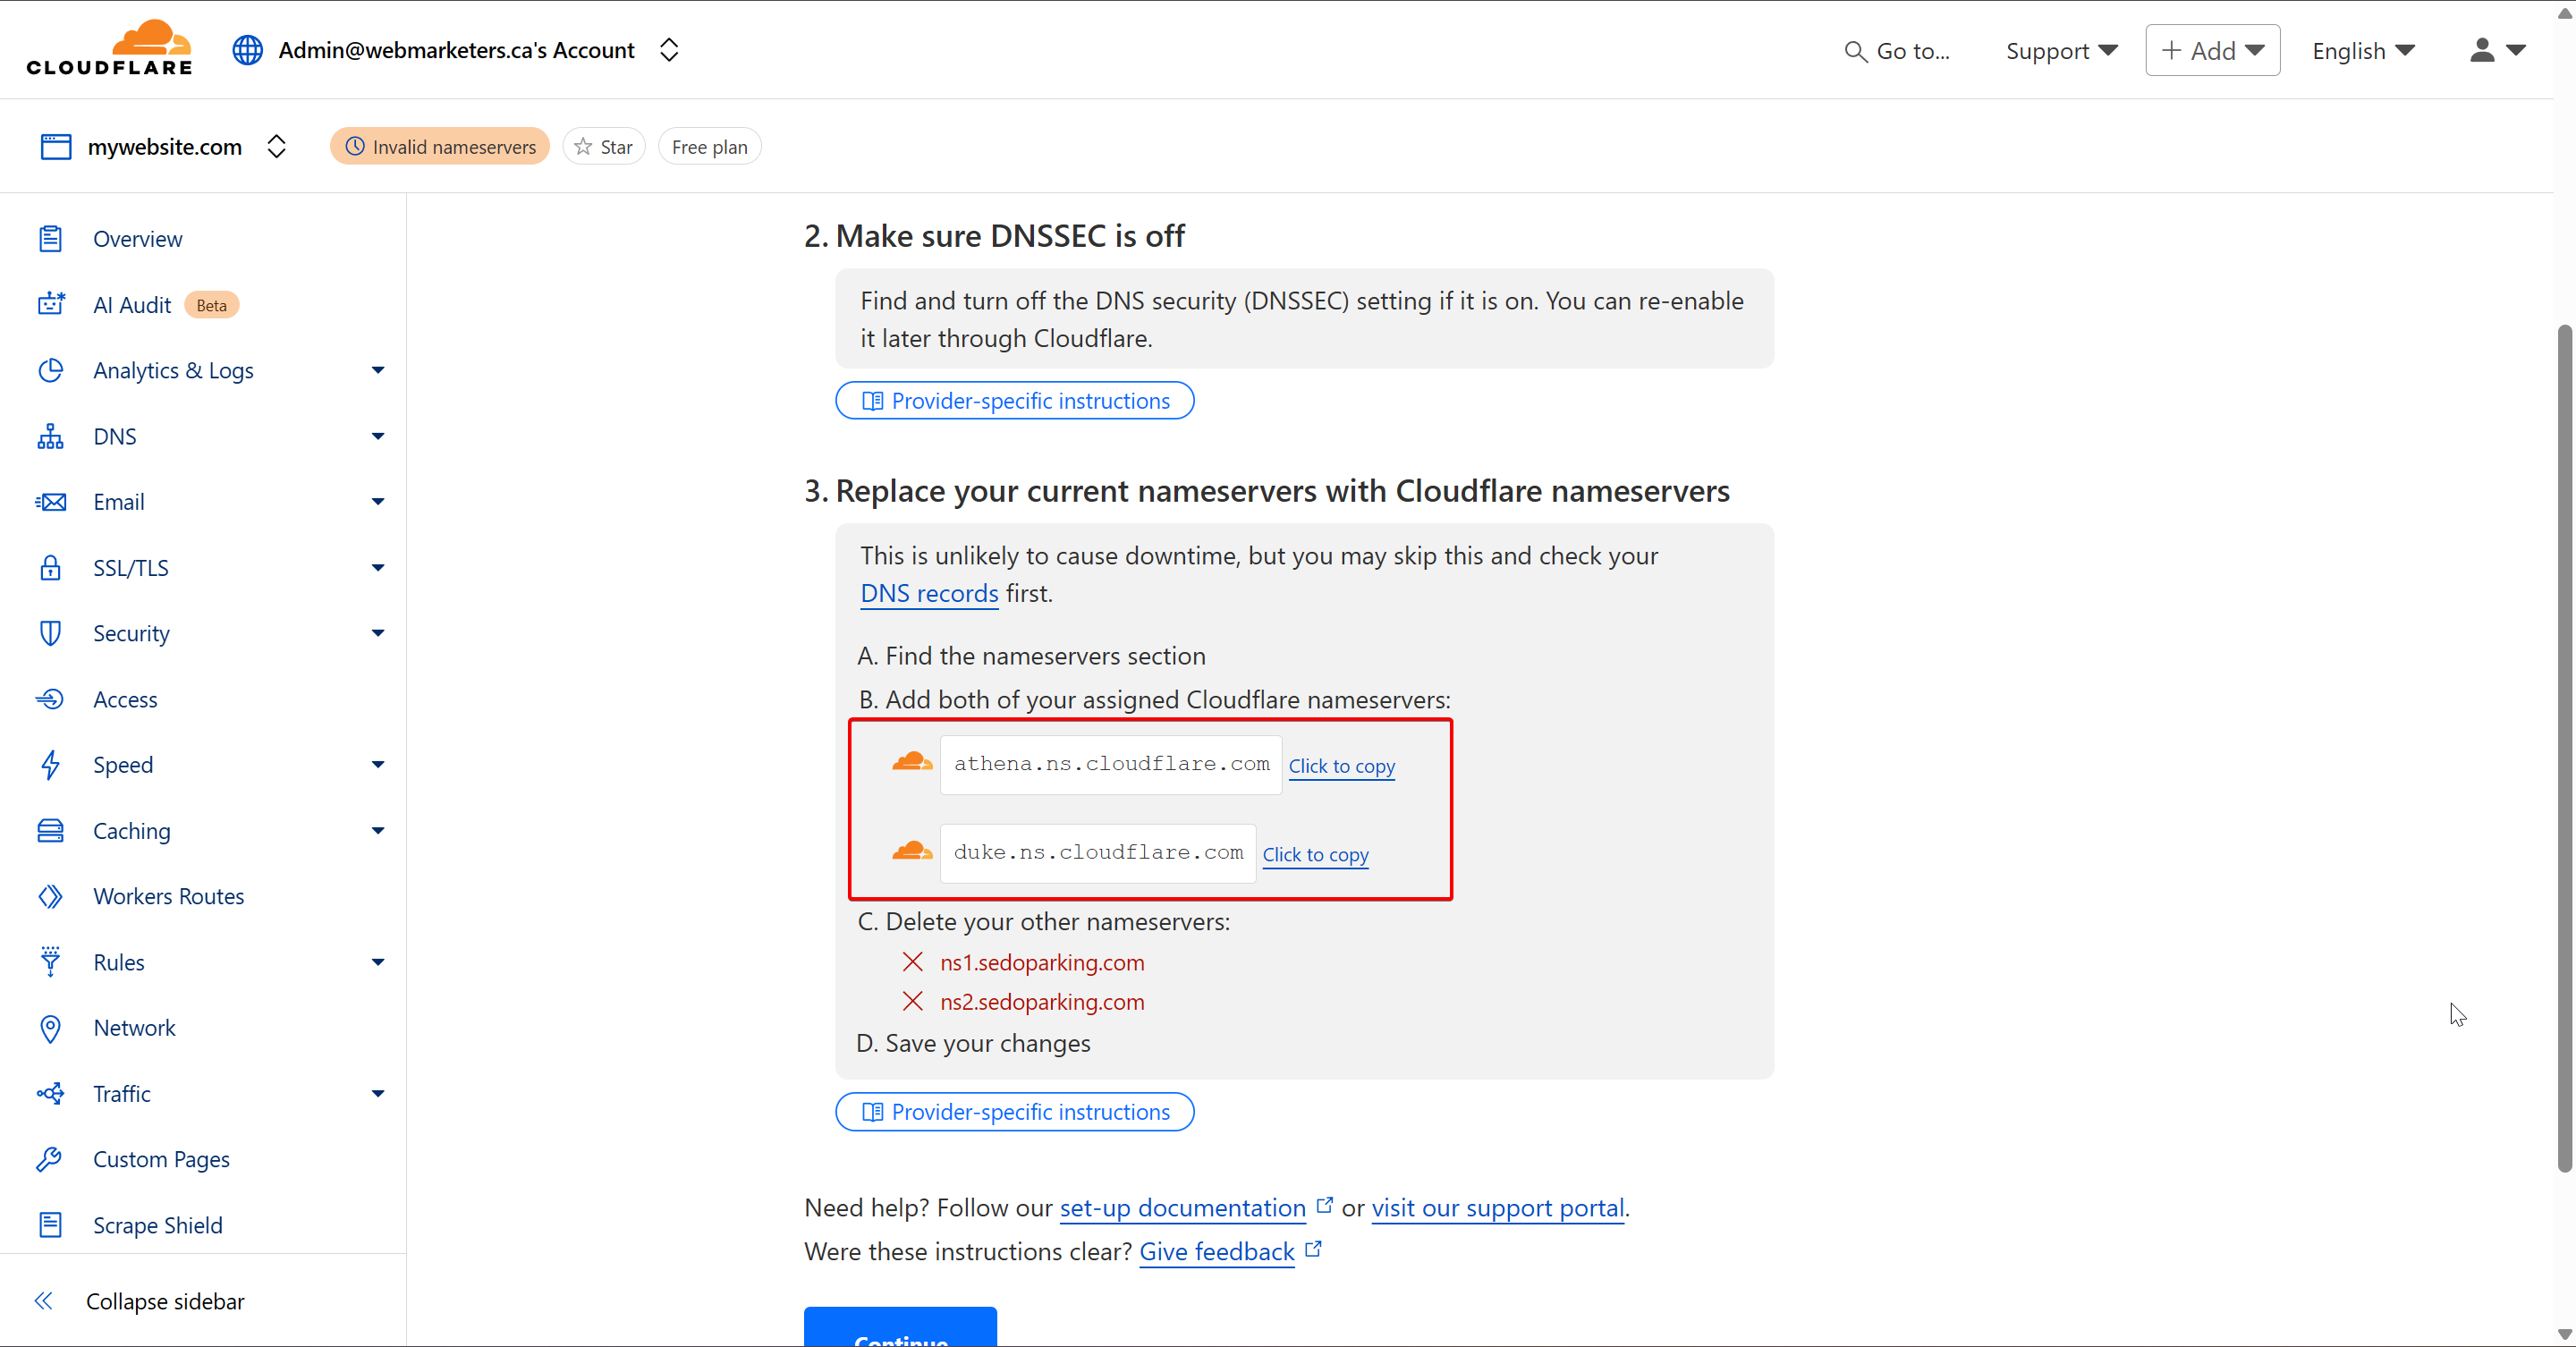
Last but not least, login to the domain's registrar, and replace your domain's nameservers with those provided by Cloudflare.
Usually, we will have athena.ns.cloudflare.com and duke.ns.cloudflare.com
Once you make the switch in the registrar, click "Continue".
Cloudflare will then verify the nameservers have changed, and the DNS Zone in Cloudflare will now be in use.
Once the nameservers have been confirmed by Cloudflare, the DNS Zone will take effect, which means you will now have the ability to easily control DNS records for various domains in one dashboard.
Introduction to HTML5 Display Ads
HTML5 Display Ads are dynamic, interactive advertisements built using HTML5 technology. They are designed to run seamlessly across devices and browsers, offering a rich media experience that goes beyond static images. These ads can include animations, video, and interactive elements, making them a powerful tool for engaging audiences online.
Purpose of HTML5 Display Ads
The primary goal of HTML5 Display Ads is to capture user attention and drive engagement. Whether promoting a product, service, or brand, these ads are crafted to deliver a message quickly and effectively. Their flexibility allows marketers to tailor content to specific audiences, increasing relevance and impact.
Key purposes include:
- Brand Awareness: Visually striking ads help reinforce brand identity.
- Lead Generation: Interactive elements can encourage clicks and conversions.
- Retargeting: HTML5 ads are often used in remarketing campaigns to re-engage previous visitors.
- Product Promotion: Showcase features through animation and interactivity.
The Purpose of Display Ads in a Comprehensive Marketing Strategy
HTML5 Display Ads are a vital component of a multi-channel digital marketing strategy. They complement other tactics such as search engine marketing, social media advertising, and email campaigns by:
- Extending Reach: Display ads appear across a wide network of websites and apps.
- Supporting Funnel Stages: From awareness to conversion, they can be tailored to each stage.
- Enhancing Retargeting: Personalized ads based on user behavior improve relevance.
- Driving Traffic: Well-placed ads can direct users to landing pages or product sites.
When integrated with platforms like Google Ads or Display & Video 360, HTML5 ads benefit from advanced targeting, analytics, and optimization tools.
Limitations and Considerations
While HTML5 Display Ads offer many advantages, they also come with certain limitations.
Display Ad Limitations/Disadvantages:
- Ad Fatigue: Users may become desensitized to repetitive ads, reducing effectiveness.
- Low Click-Through Rates: Display ads typically have lower CTRs compared to search ads.
- Technical Constraints: Ads must adhere to strict file size, animation length, and format guidelines to be accepted by ad networks.
- Ad Blockers: Some users employ software that prevents display ads from appearing.
- Creative Complexity: Designing effective HTML5 ads requires both technical and creative expertise.
Understanding these limitations helps marketers set realistic expectations and optimize their campaigns accordingly.
Creating effective HTML5 Display Ads requires careful planning and adherence to technical standards. Developers and designers must collaborate to ensure ads are visually compelling, performant, and compliant with platform requirements.
Key Considerations
File Size Limits
Most ad networks impose strict file size limits (often under 150 KB for initial load). Efficient asset management—such as image compression and code minification—is essential.
Responsive Design
Ads should adapt to various screen sizes and resolutions. While some formats are fixed, responsive layouts improve compatibility across devices.
Animation Performance
Smooth animations enhance user experience but must be optimized to avoid lag or excessive CPU usage. Make sure you are familiar with Keyframes and CSS Animations before trying to animate elements.
Click-Through Functionality
Ensure that click tags are properly implemented and tested. Misconfigured click actions can result in ad rejection or poor campaign performance.
Ad Platform Compliance
Each platform (e.g., Google Ads, DV360) has specific requirements for ad behavior, duration, and supported features. Always validate ads against the latest HTML5 Ad Guidelines.
Testing and QA
Like we do on websites, ads should be tested before they go live, on every screen size exported, and every interaction. Since we're already using Google Web Designer, we can use their preview and publish options to facilitate the process.
How to Create Your First Display Ad
Start by downloading Google Web Designer, a free tool that simplifies ad creation with templates, animation features, and built-in click tag support. For specifics, follow the guide below.