Chapter 2: test Content
Suspendisse suscipit molestie tortor, eget egestas neque volutpat sit amet. Sed vestibulum magna fermentum velit blandit, eu auctor ante elementum. Vestibulum mollis elit sed sem luctus euismod. Nam blandit sem vitae sapien vestibulum, sed gravida nisl rutrum. Aliquam accumsan, leo a malesuada porttitor, dui tellus imperdiet dolor, sit amet sodales mauris leo ut velit. Sed eget vehicula nunc. Donec vel posuere ipsum. Aenean maximus iaculis neque, eget tempor mauris dignissim in. Maecenas feugiat erat ut iaculis rutrum. Ut malesuada diam vitae orci rhoncus posuere. Morbi feugiat ultricies porta. Nullam nulla est, pretium at felis sollicitudin, blandit venenatis ipsum. Nam venenatis sodales lacini
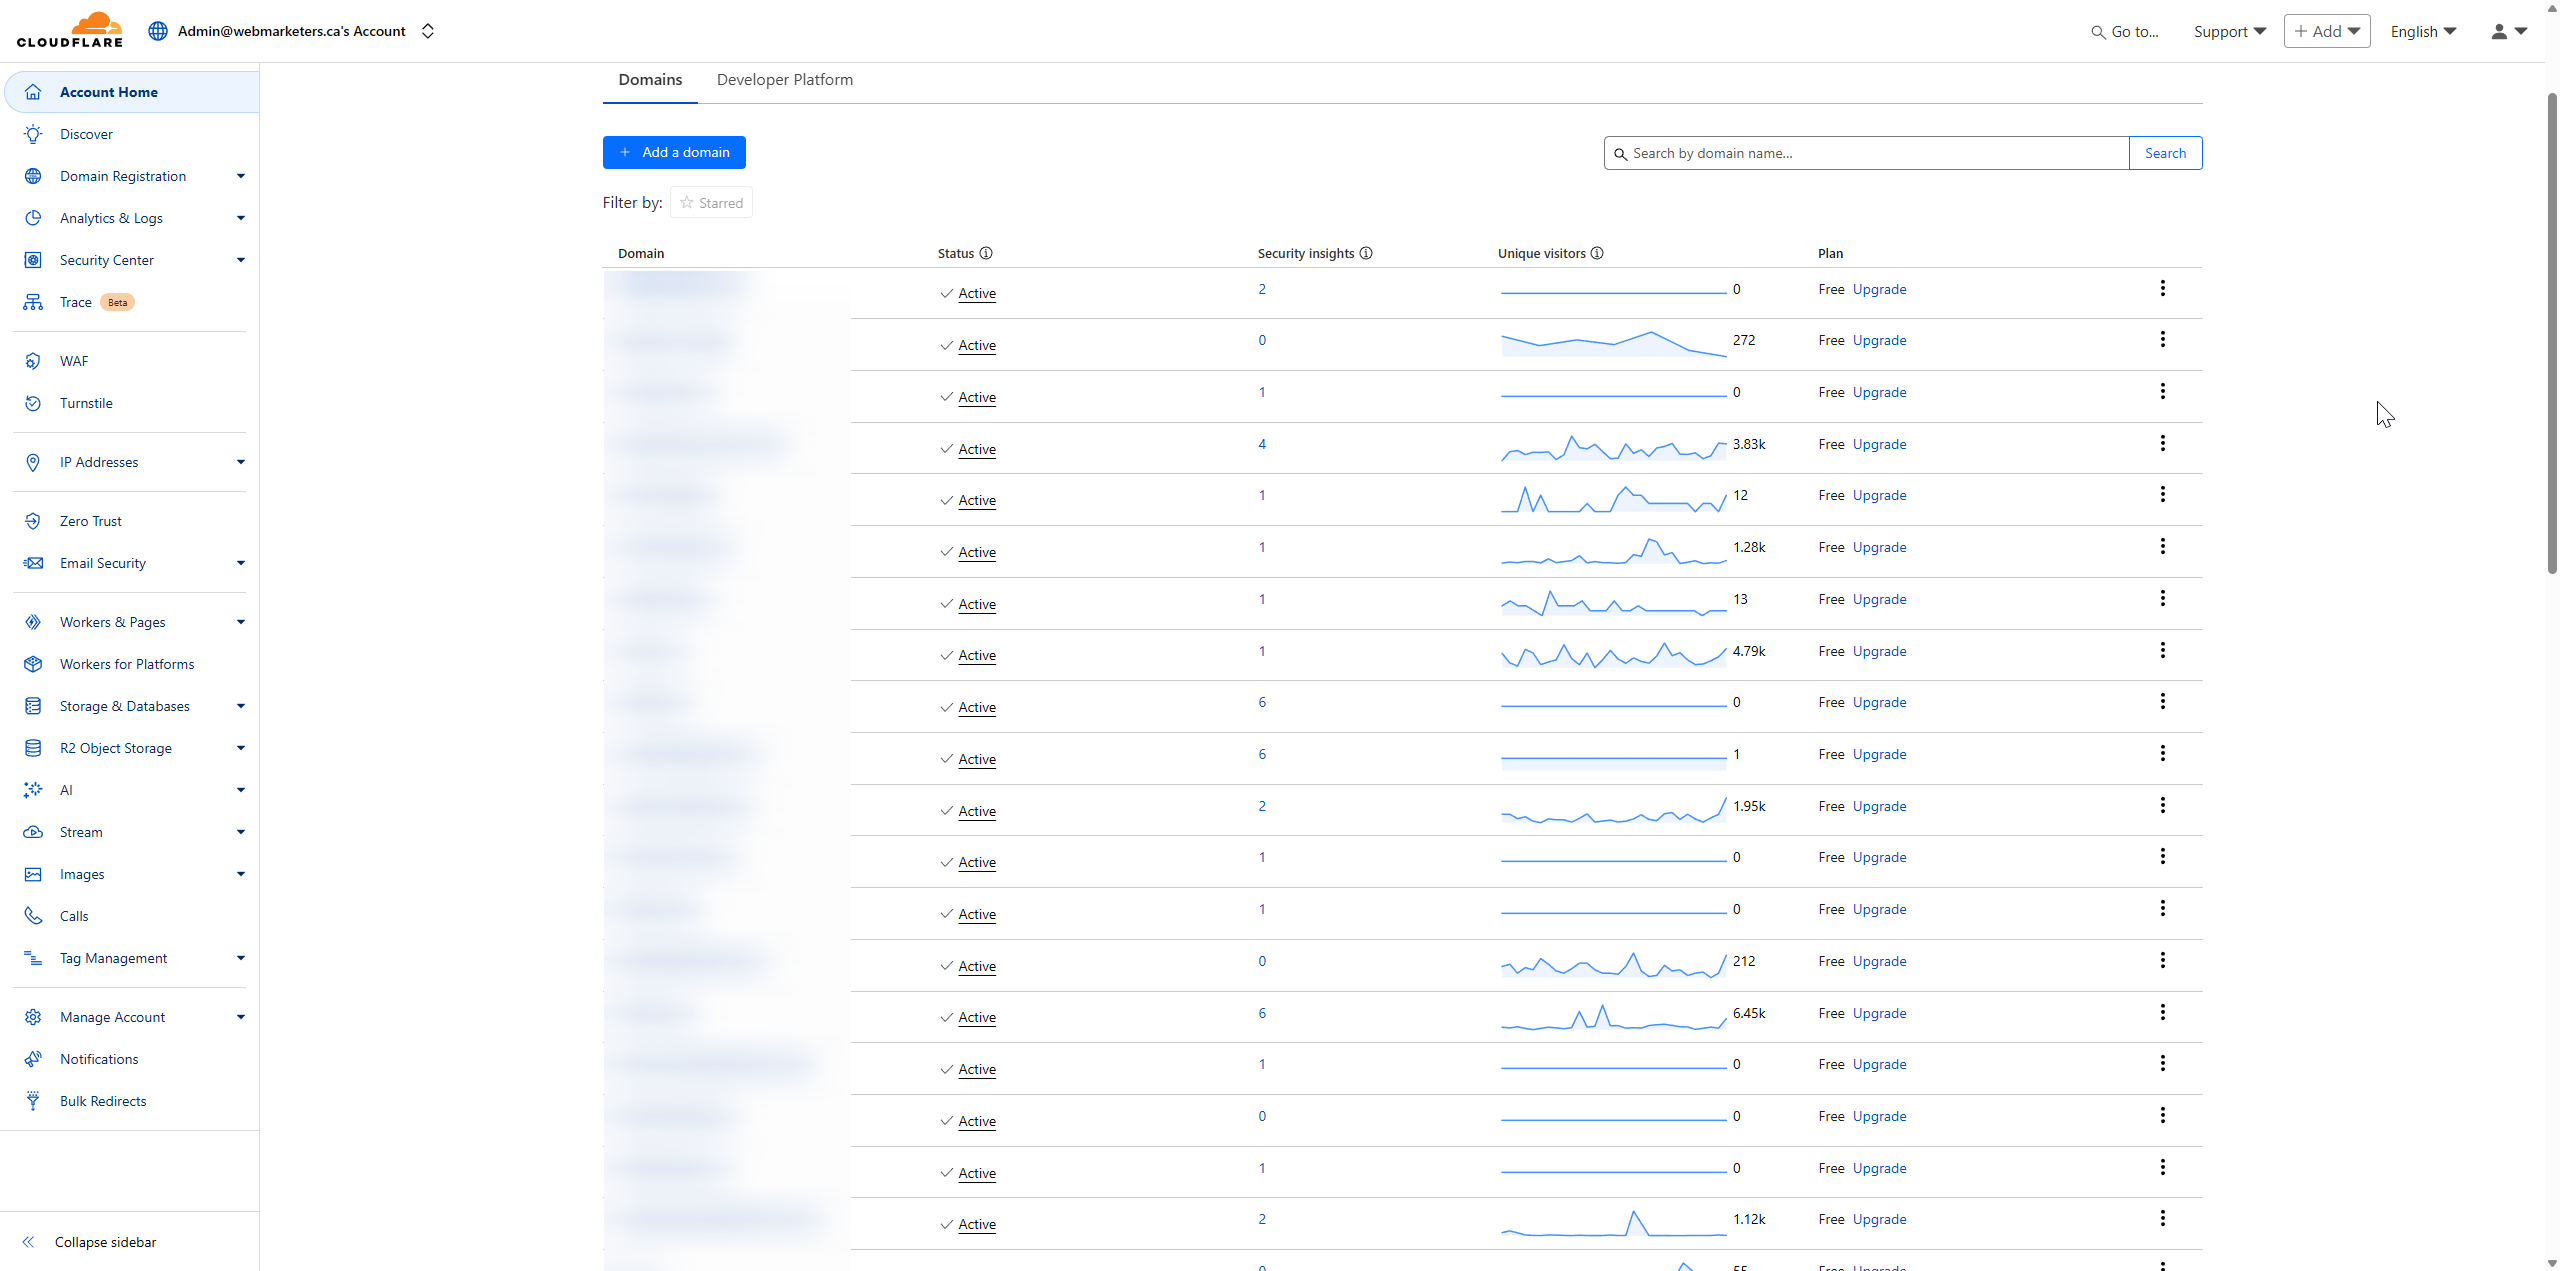
This document provides a step-by-step guide to setting up a domain in Cloudflare, emphasizing its user-friendly interface and straightforward setup process. Cloudflare enhances website performance through faster load times while also offering a secure and reliable platform.
It also makes it very easy for us to find a domain, Cloudflare is our go-to solution for storing clients domain information. It allows us to easily bypass 2FA on registrars during emergencies - when we need access more than ever.
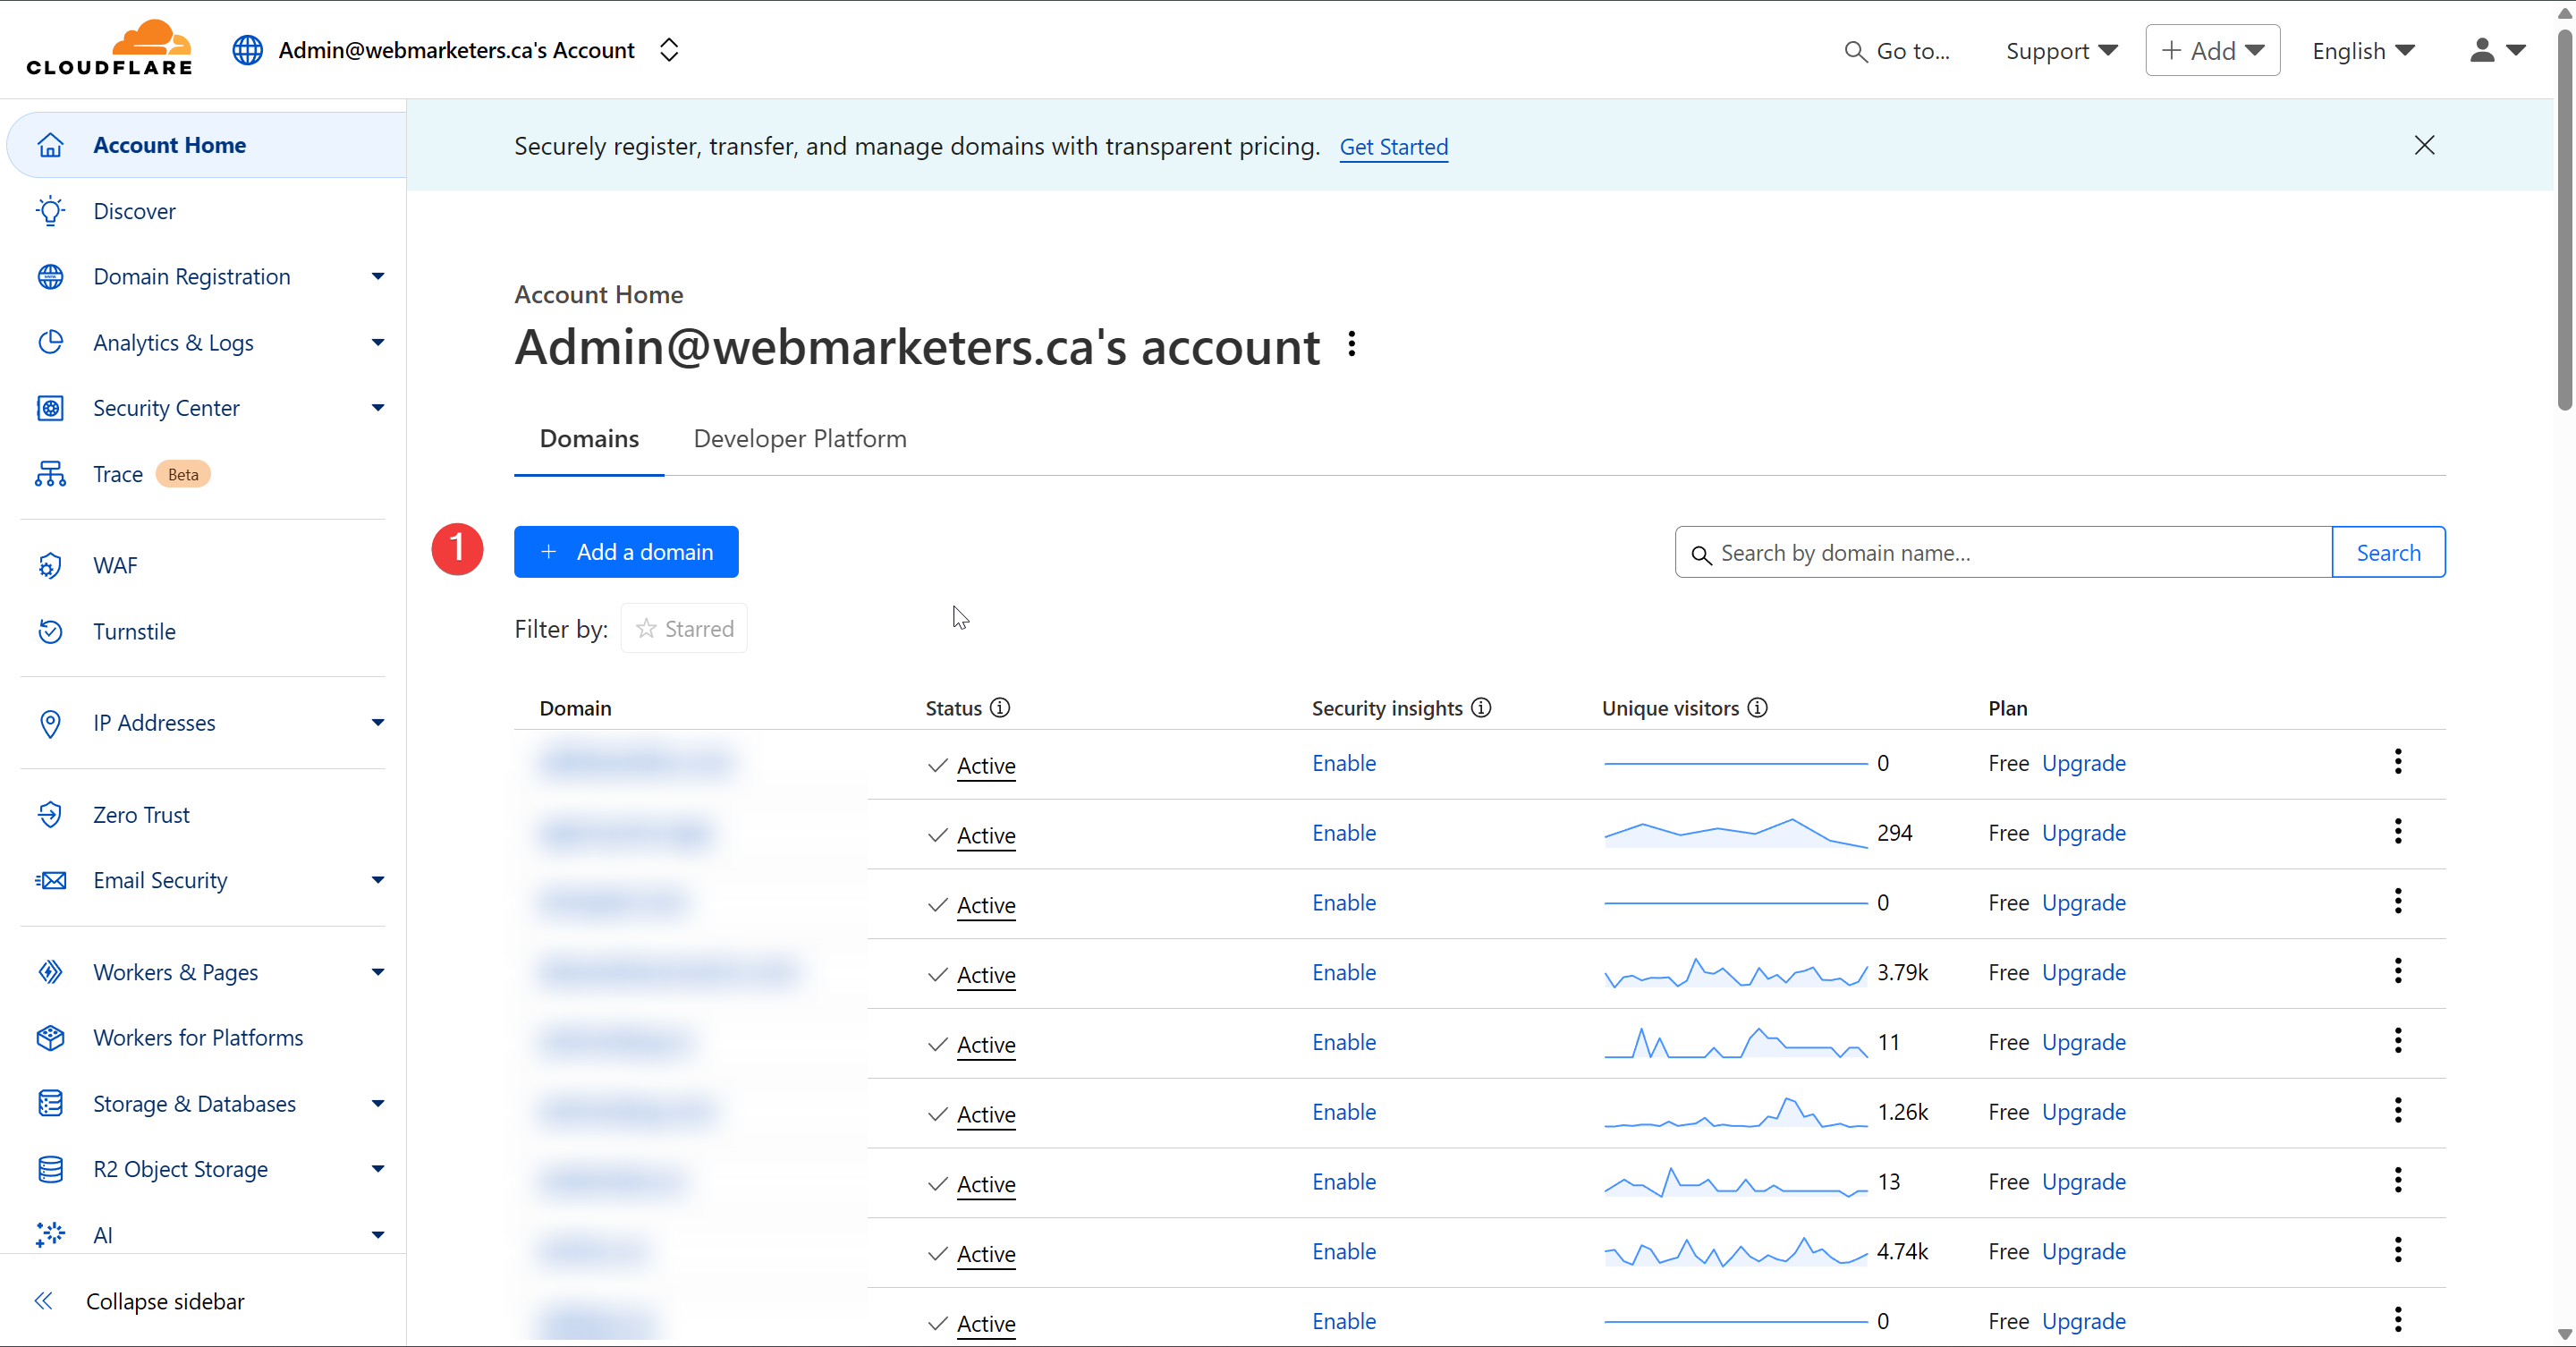
First, head over to our Cloudflare Dashboard and click "Add a domain".
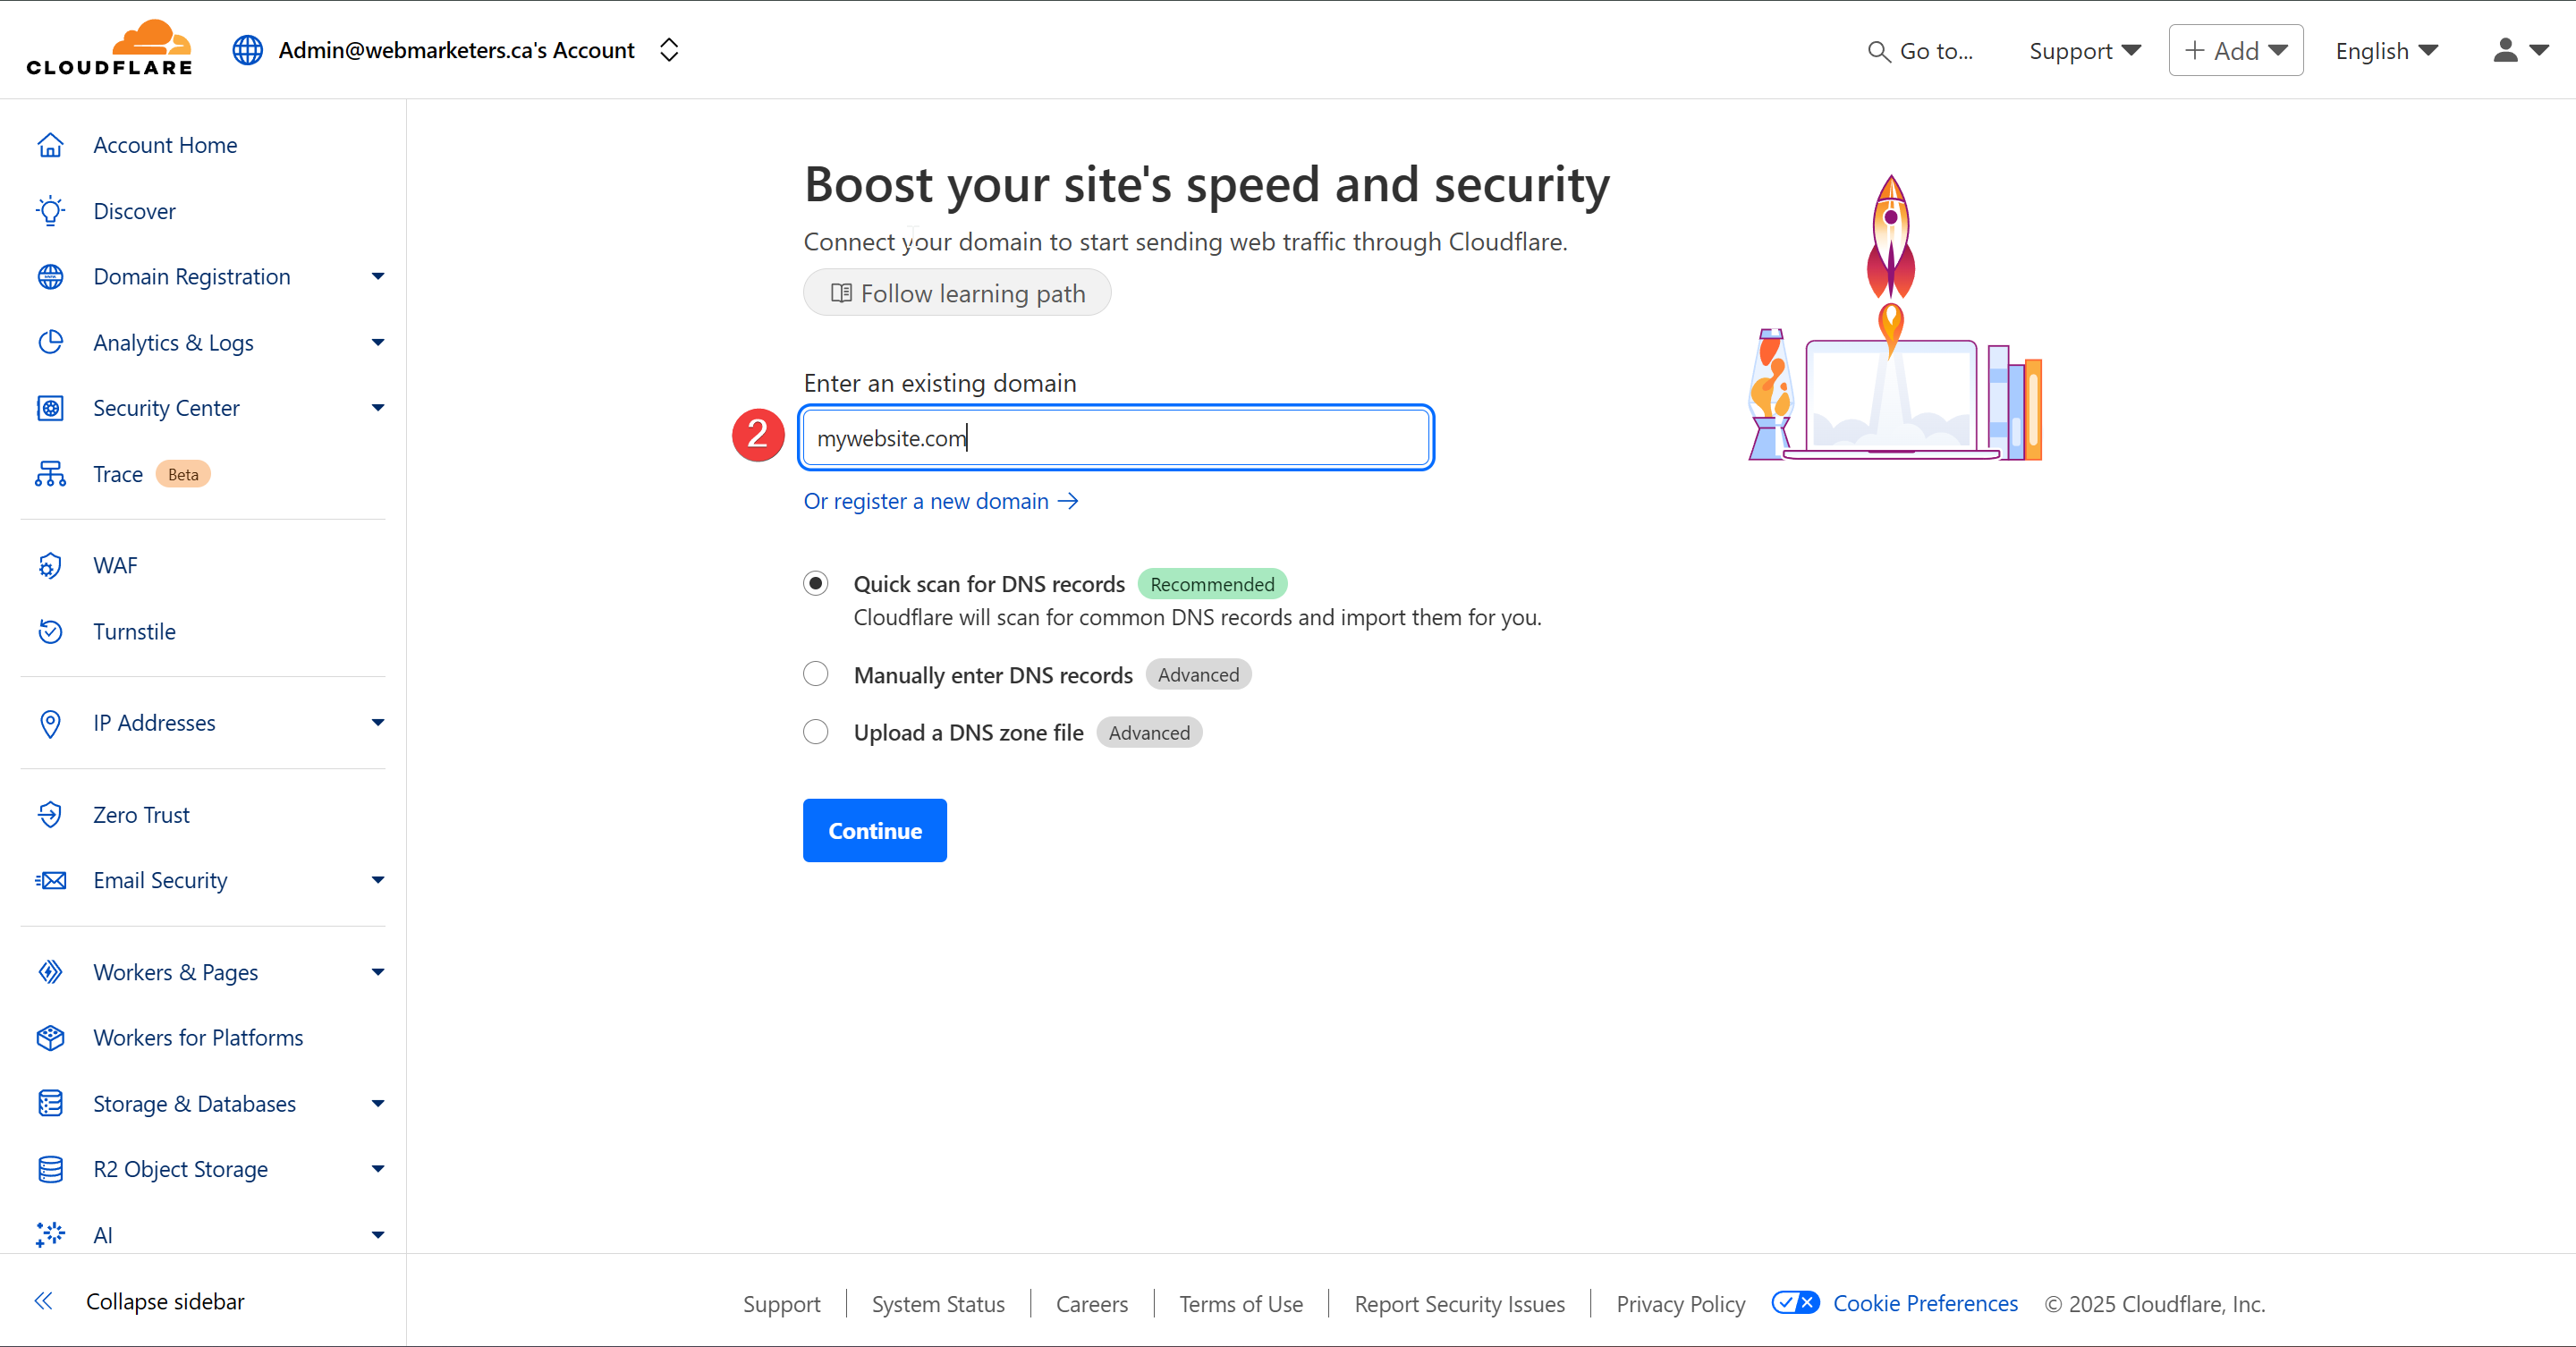
Then, paste or add the domain name and confirm that "Quick scan for DNS records" is selected.
Once that's confirmed, click "Continue".
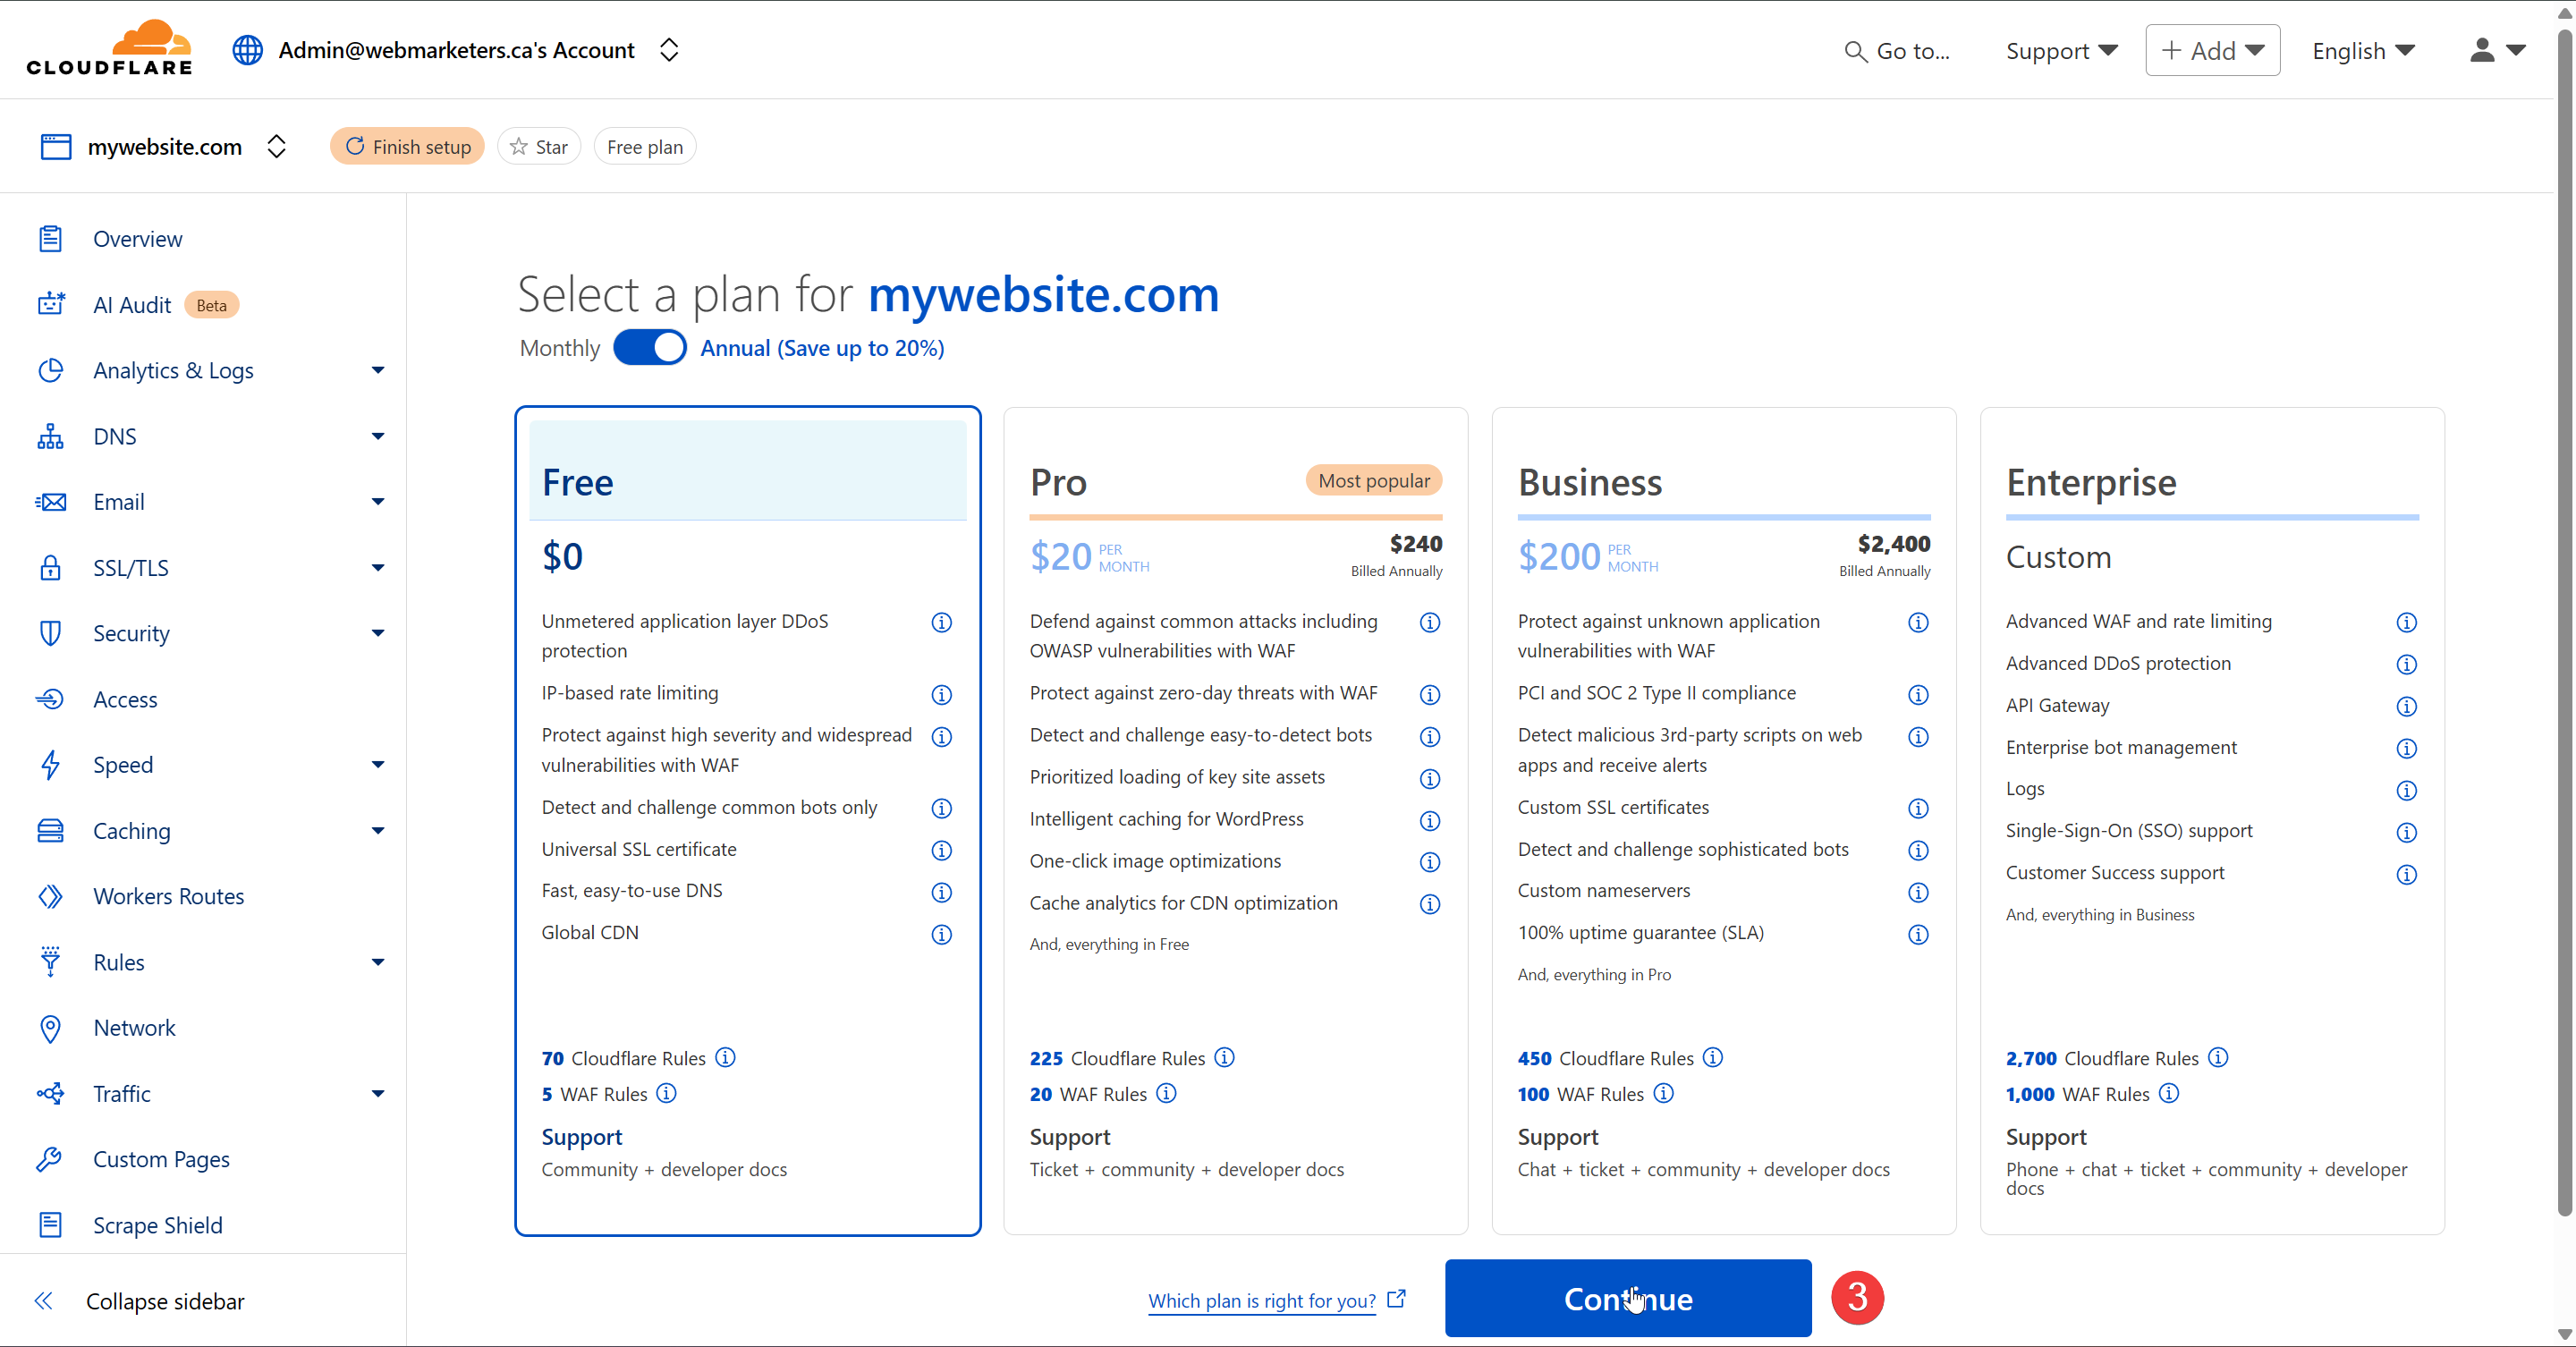
Confirm that the Free plan is selected and click "Continue".
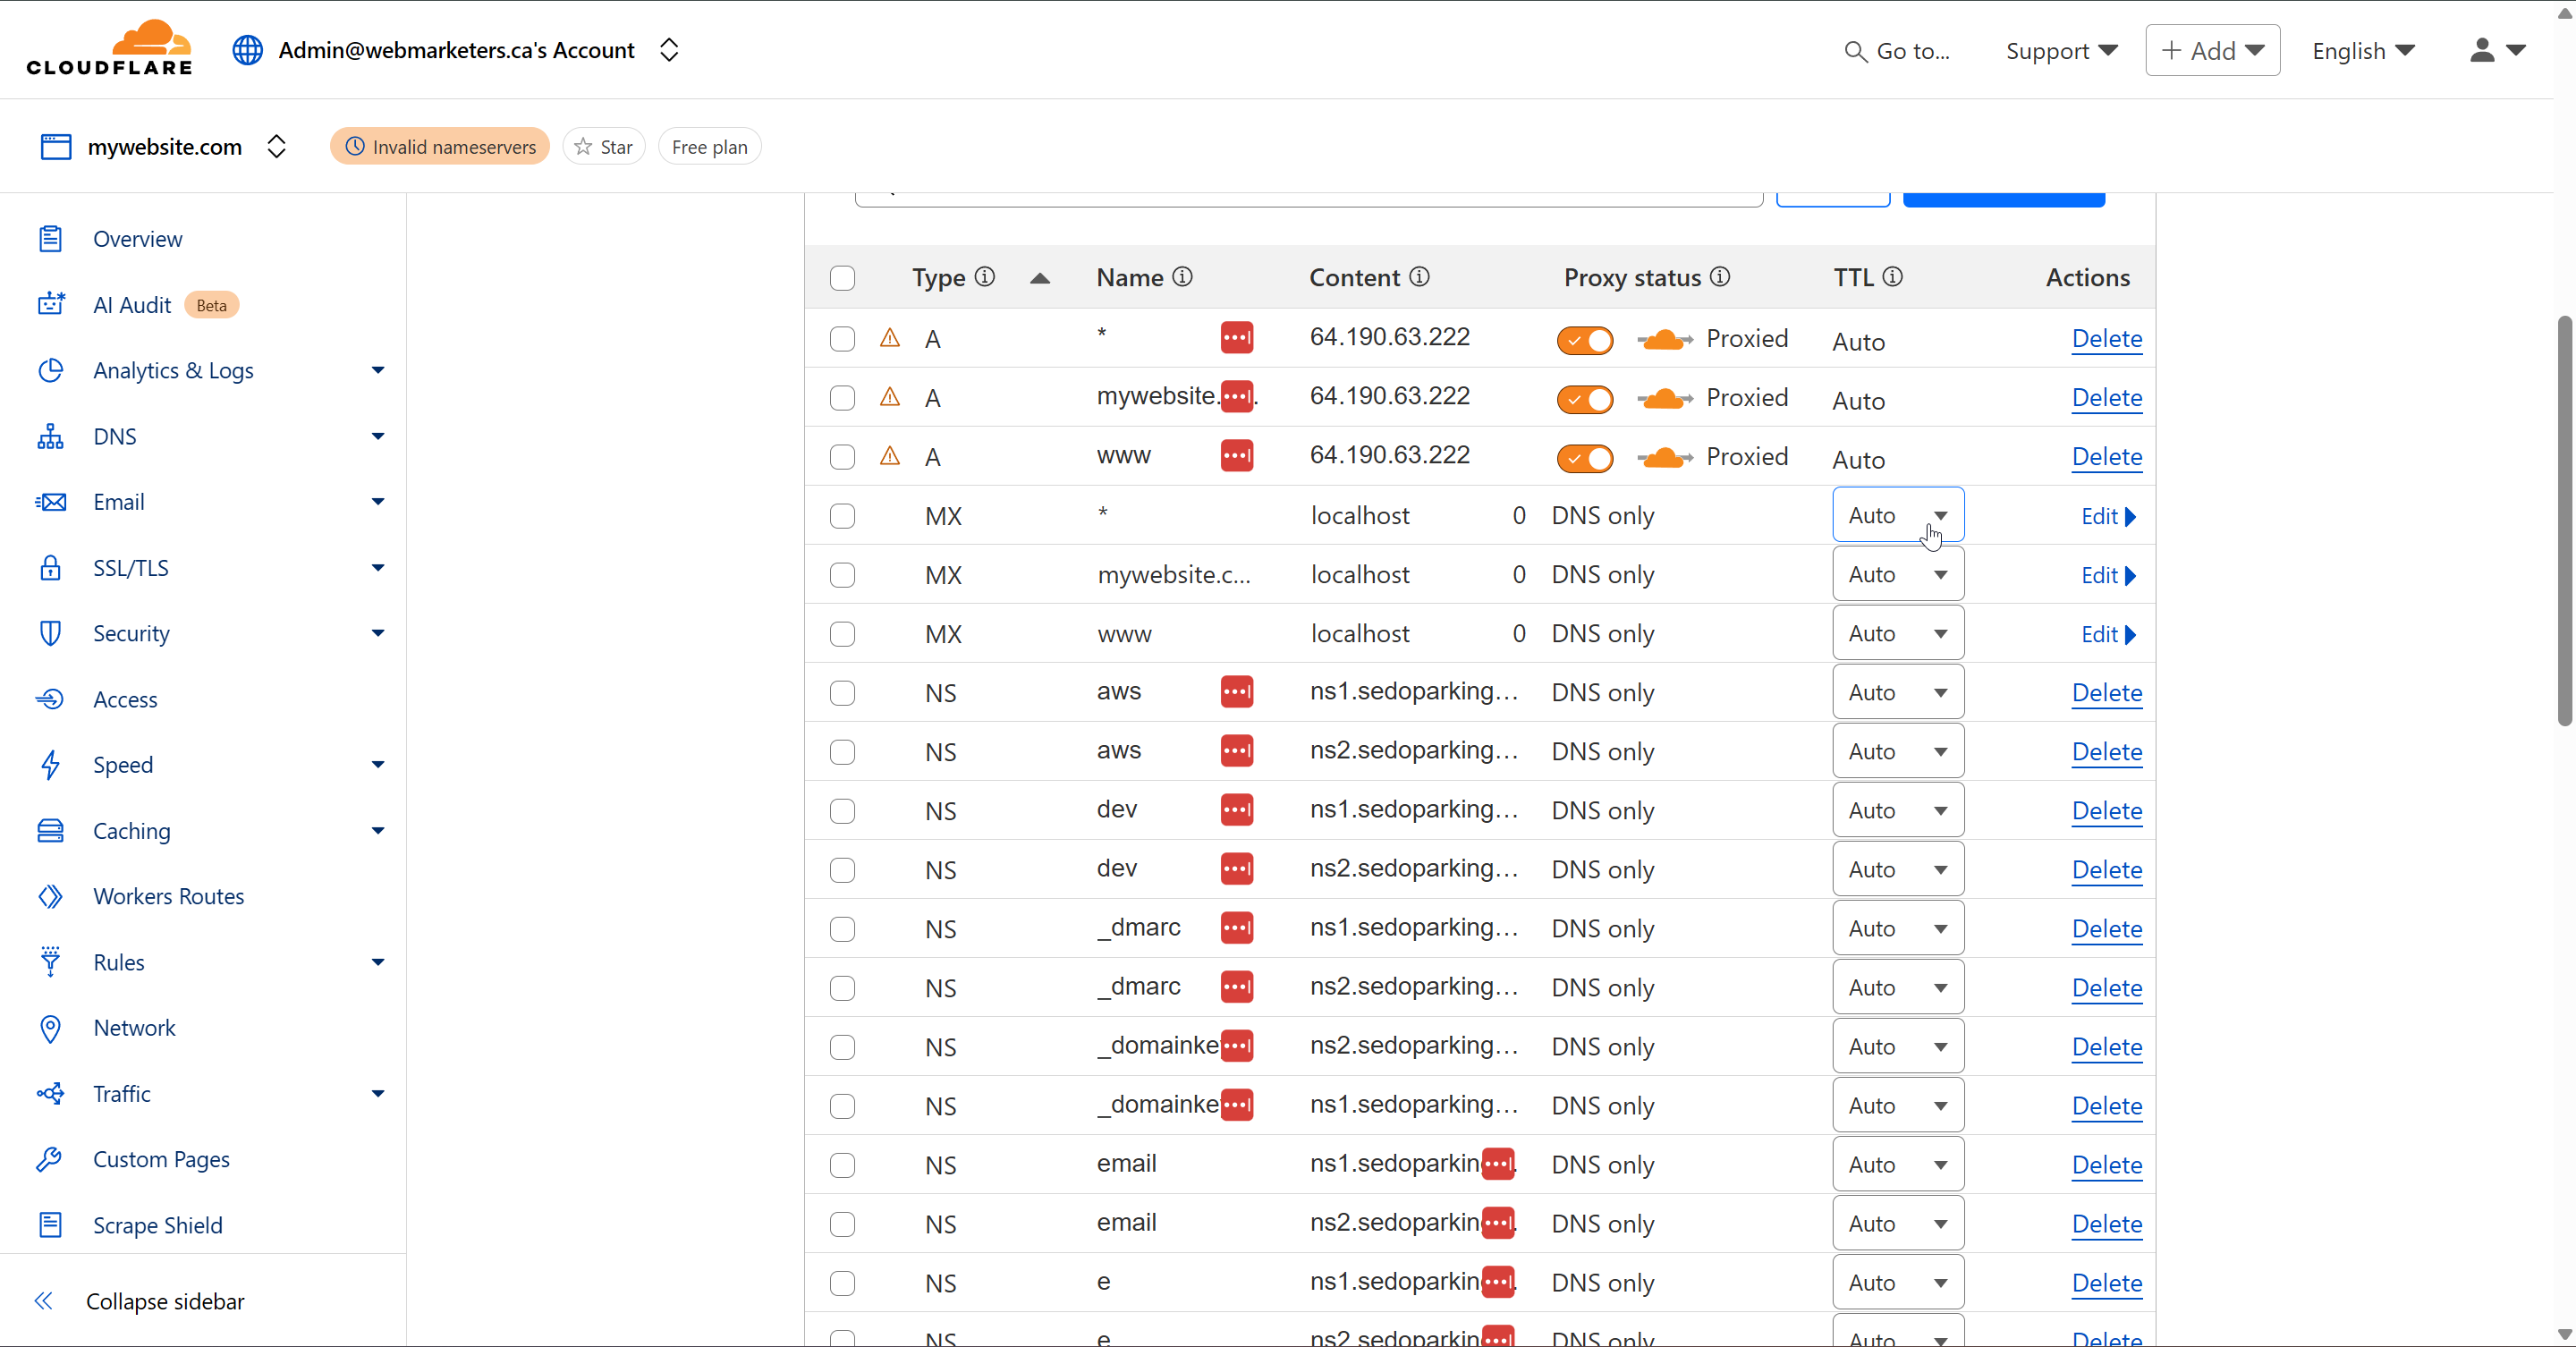
Verify that the DNS records match what you currently have set on the registrar. It's especially important that you confirm that the A, CNAME, MX and TXT Records match existing records.
Cloudflare can be used purely for their DNS Zone. Although they offer a variety of other services, we mainly use it for the DNS Zone, since it allows us to easily see or modify any DNS Records, as well as share access to it with clients.
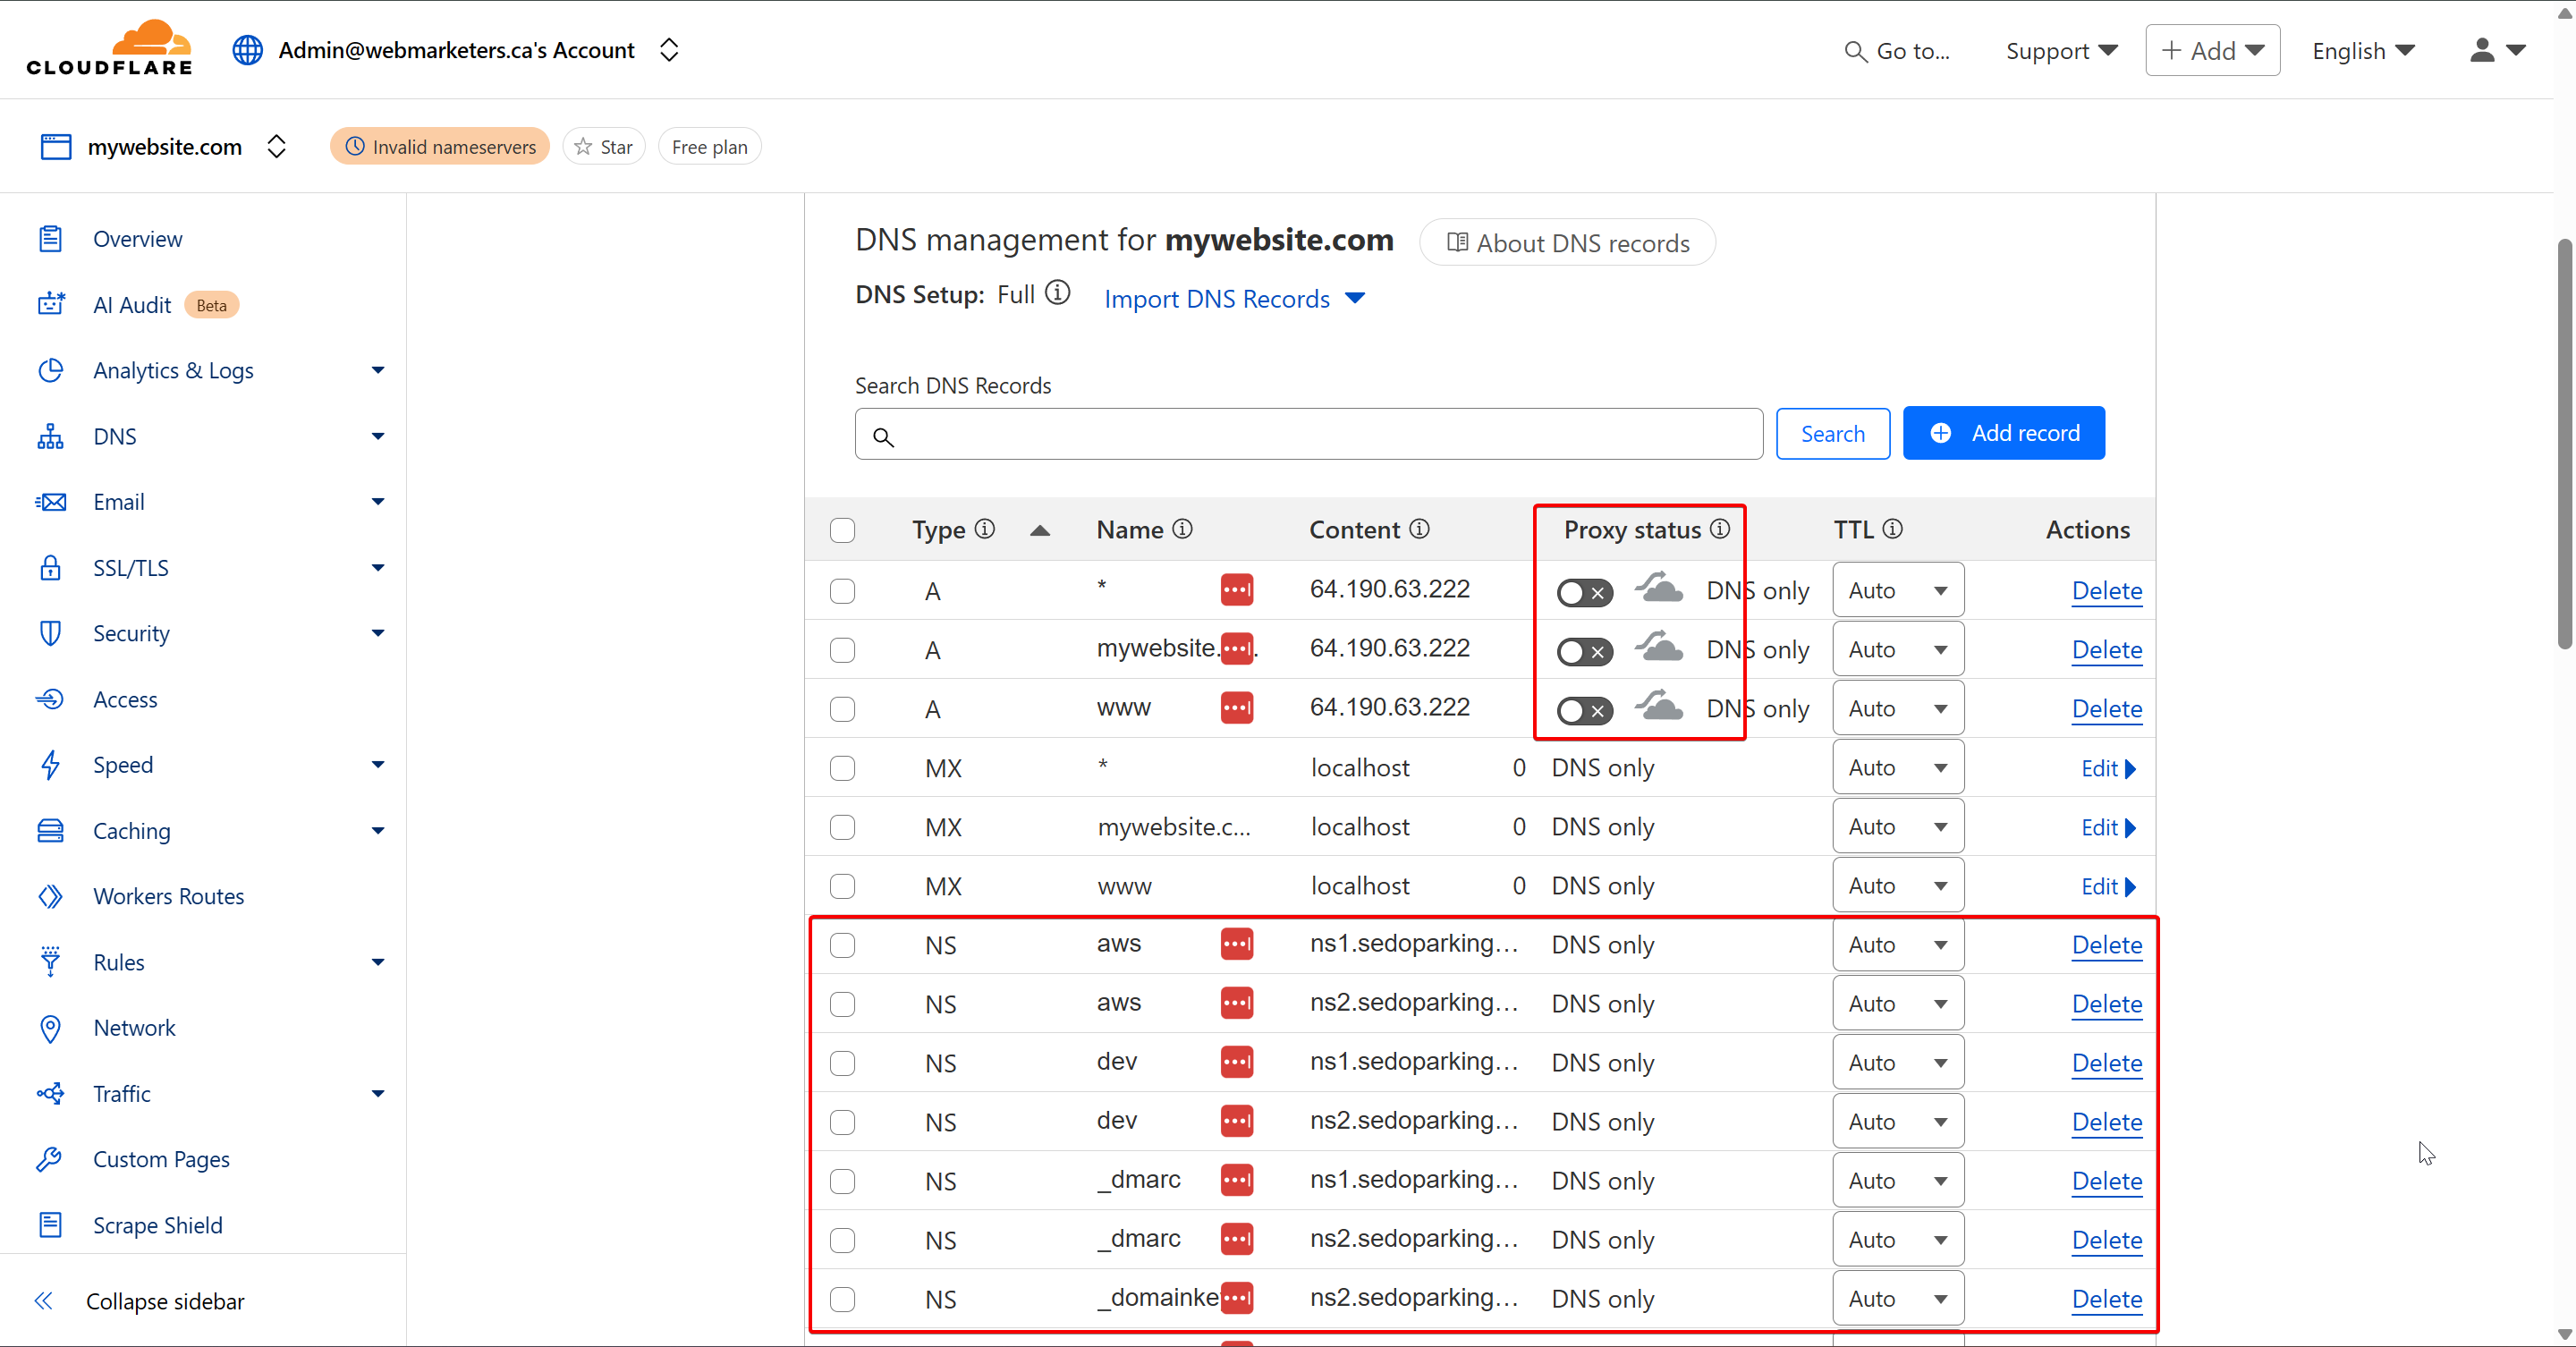
Then, turn off the proxy status for the A Records, and remove all unused NS (Nameserver) Records. These will not be needed with the switch to Cloudflare.
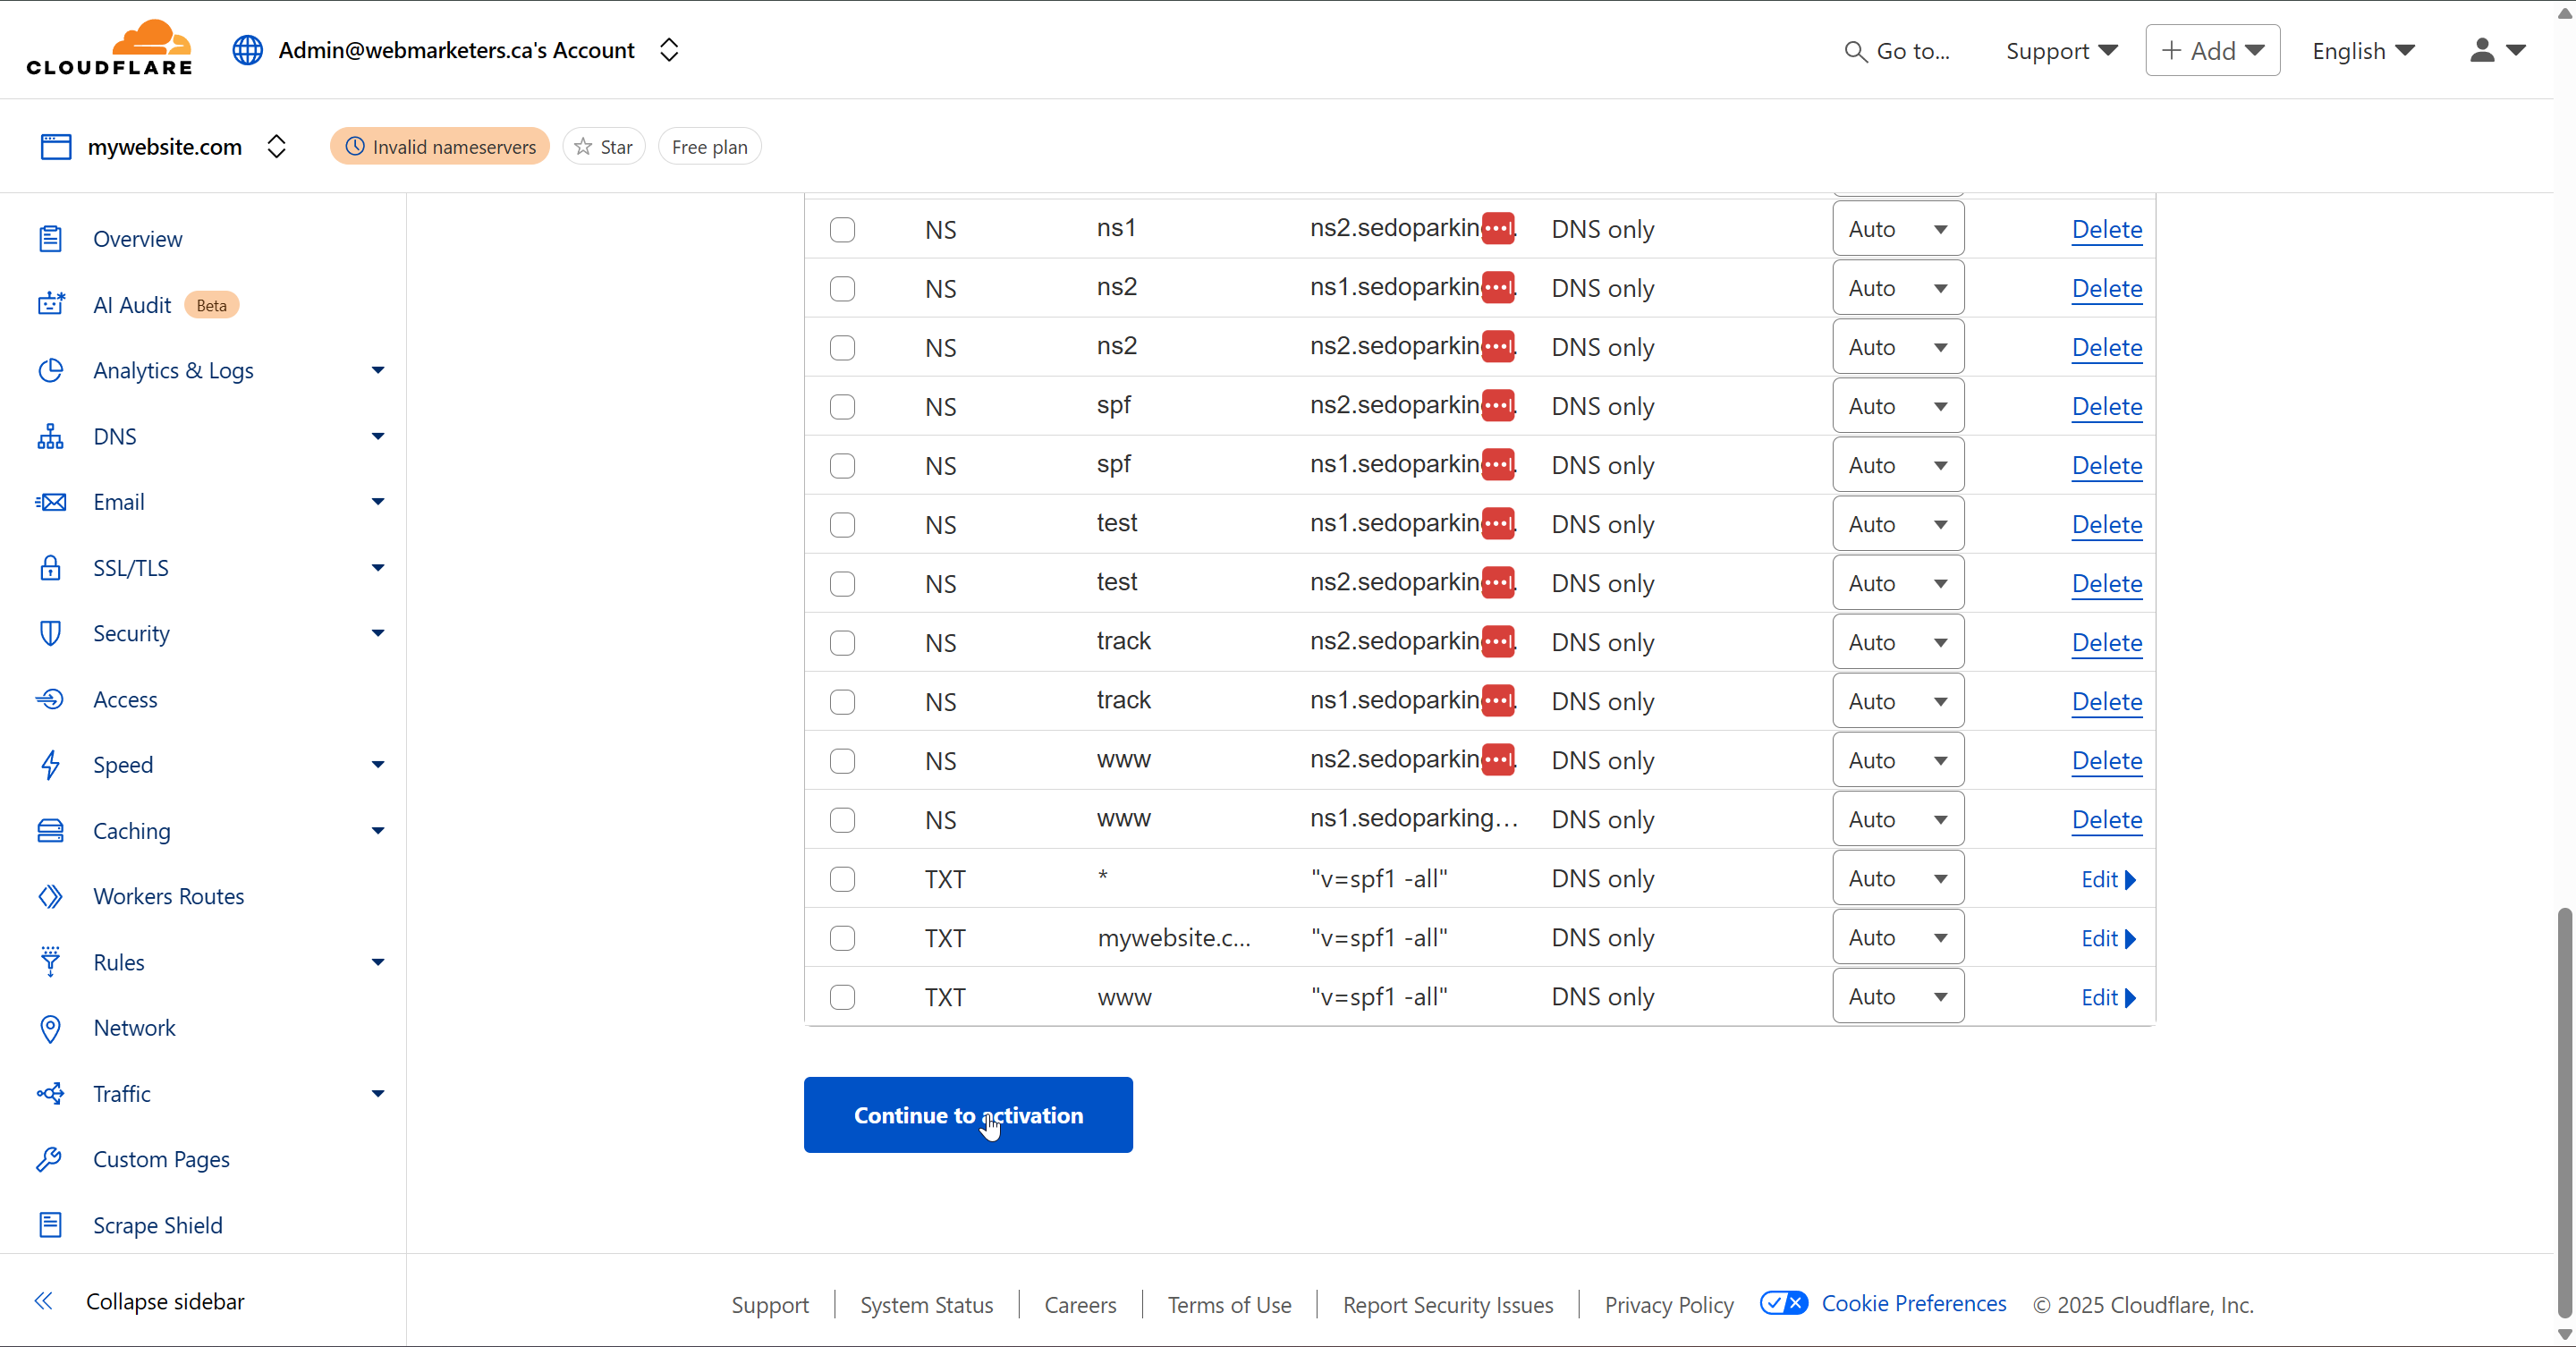
Once this is done, click "Continue to activation".
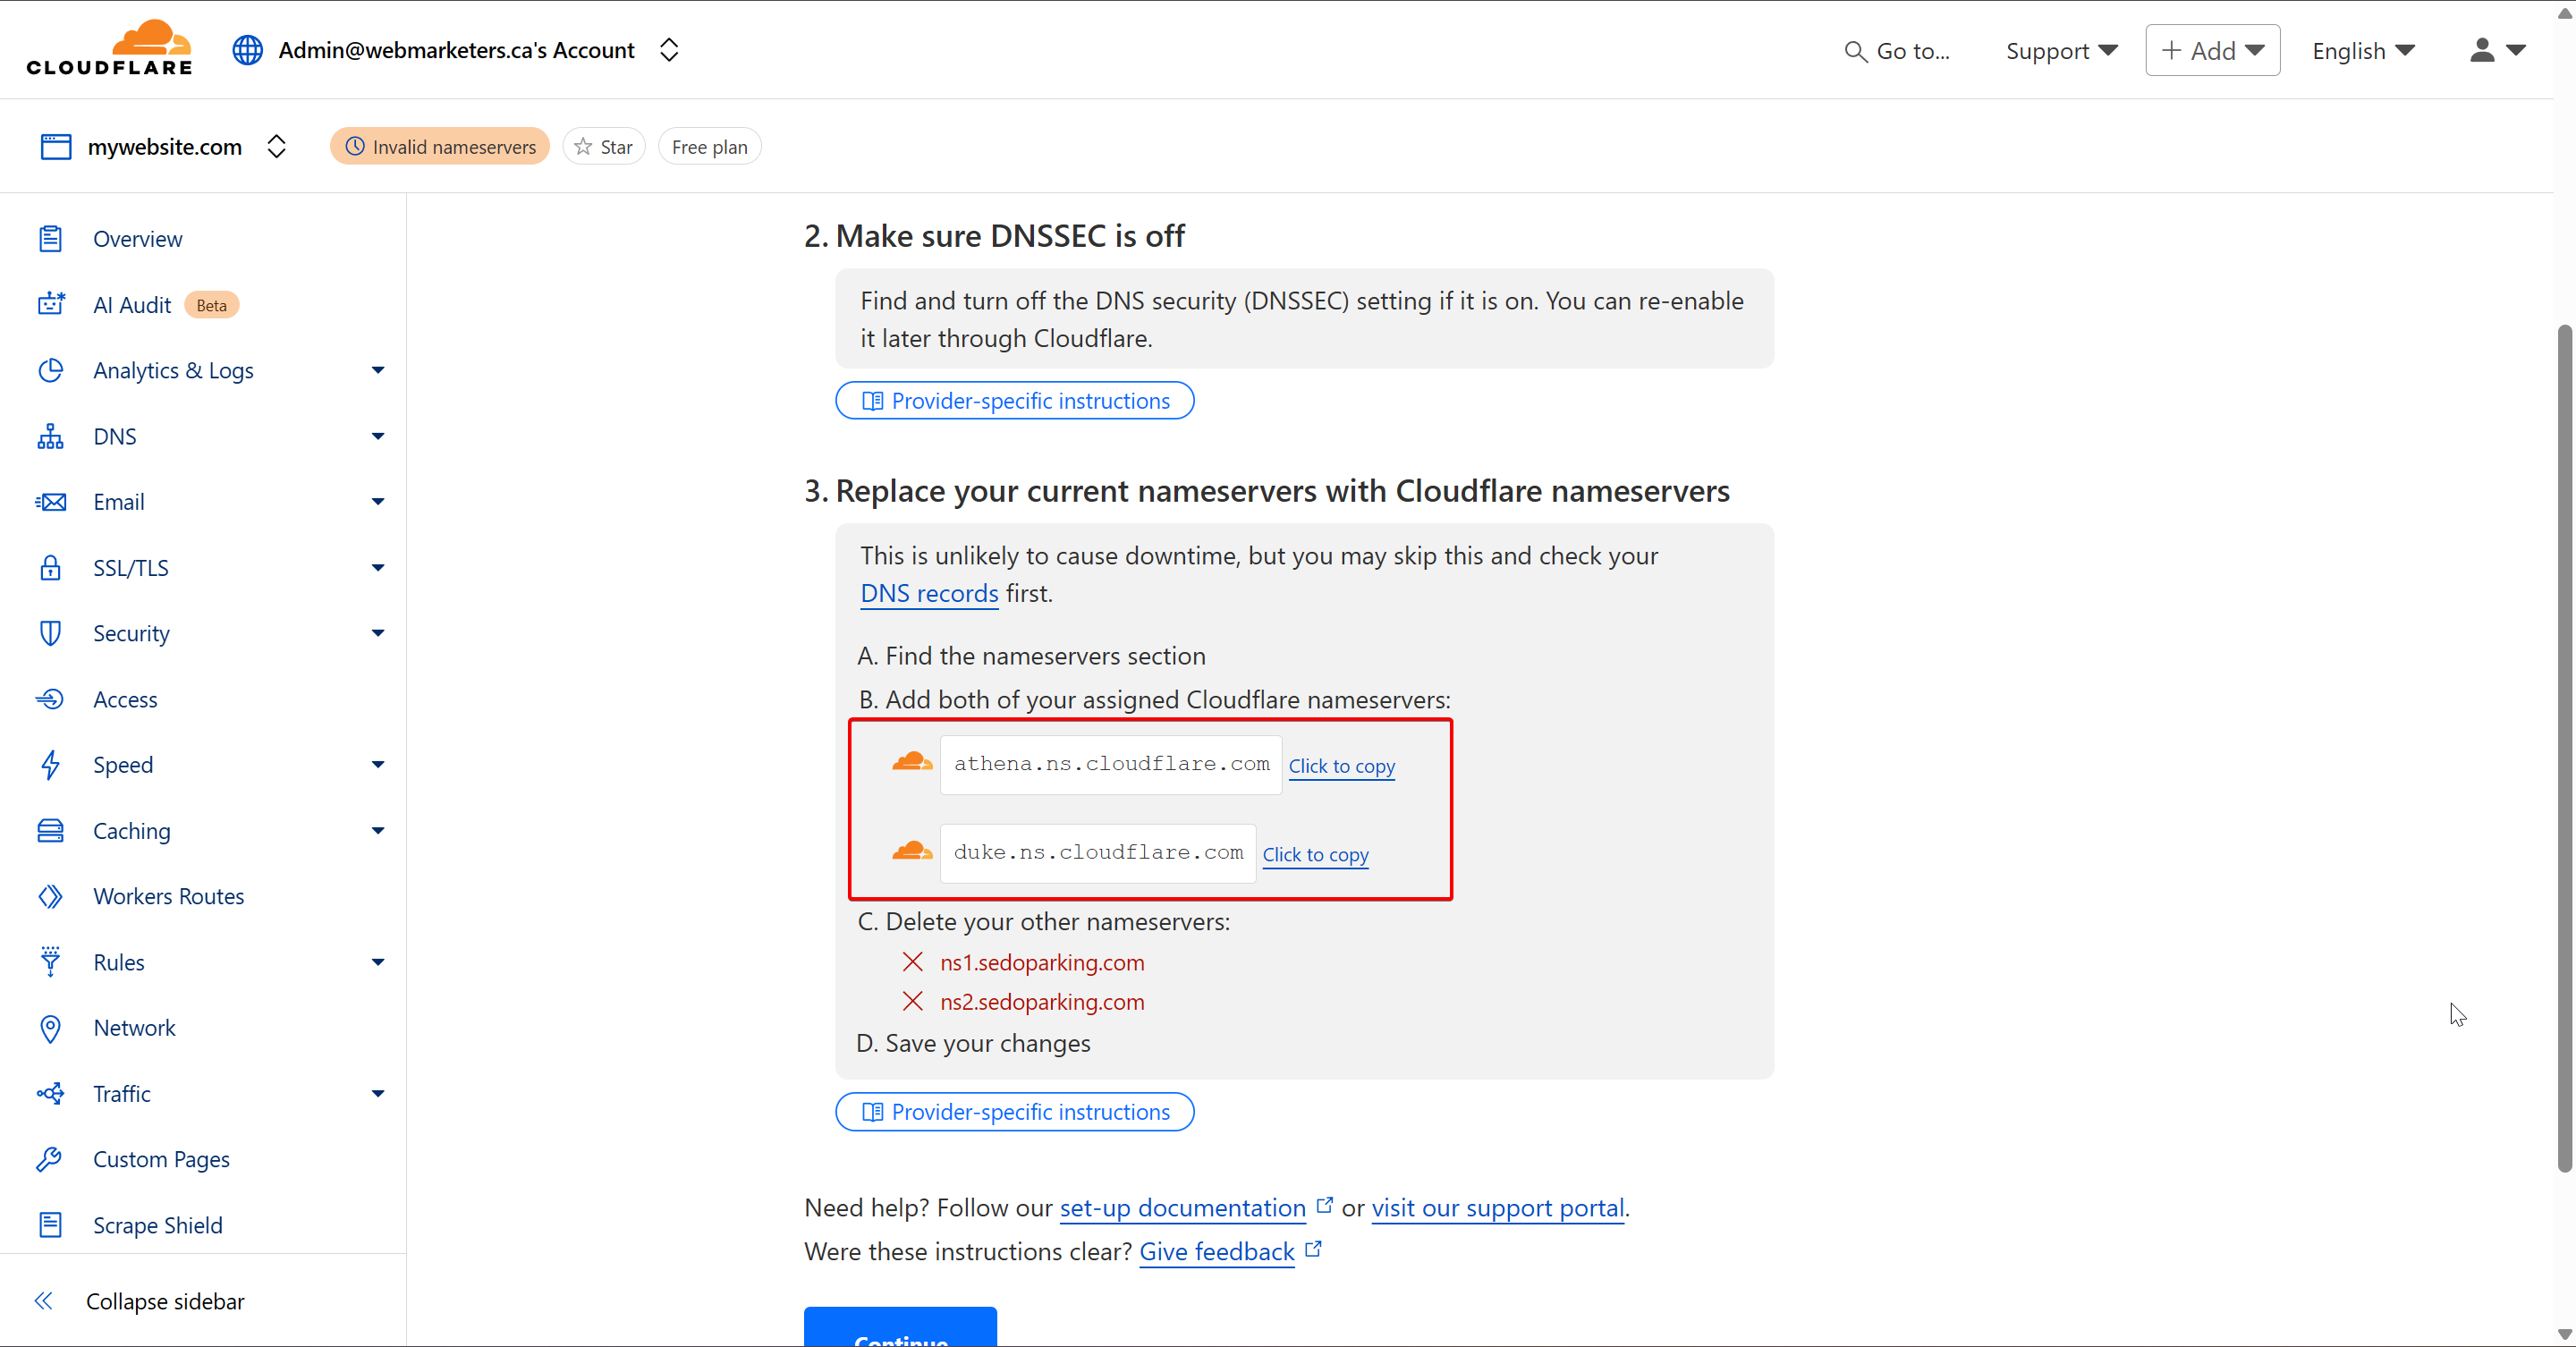
Last but not least, login to the domain's registrar, and replace your domain's nameservers with those provided by Cloudflare.
Usually, we will have athena.ns.cloudflare.com and duke.ns.cloudflare.com
Once you make the switch in the registrar, click "Continue".
Cloudflare will then verify the nameservers have changed, and the DNS Zone in Cloudflare will now be in use.
Once the nameservers have been confirmed by Cloudflare, the DNS Zone will take effect, which means you will now have the ability to easily control DNS records for various domains in one dashboard.